


Building Your Network Map 6-11
Creating Network Maps
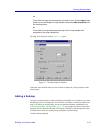
Setting a Background Grid
You can set up a grid in your map window to assist in drawing map items or in positioning
map objects, symbols, and icons. To establish a grid:
1. Click to select the Display Grid option to activate the grid display in the map.
2. In the Grid Size field, define the size of each grid square by typing in a pixel
value.
When you open the Map window, a grid will display in the map background. To turn off
the grid, return to the Map View Properties window and click to deselect the Display Grid
option.
Setting Print Options for the Map
NetSight Element Manager lets you print map window information to any printer
configured for your system. If you would like to know how to place map items so they will
fall within a page’s print area, you can choose to have the pagination appear in your map
window. To do so:
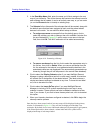
1. Click the Show Page Lines option. When you open the Map window, dashed
yellow and red lines display to indicate the pagination for the map. Each area
bounded by dashed lines represents the printable area of a single page.
You can also use the File —> Print Preview option from the primary window menu bar
to preview how the map information displays on the printed page. Refer to About
NetSight Element Manager in Chapter 2, Overview of NetSight Element Manager, for
more information on the Print Preview option.
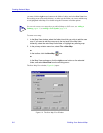
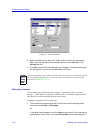
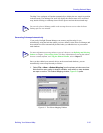
Setting the Icon Label Font
You can use the Font button to select the font type and size that will be used to label your
map elements.
1. Click Font. The standard Microsoft Font window, Figure 6-6, opens.
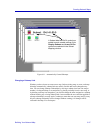
TIP
NetSight Element Manager includes a self-extracting ZIP file that contains a variety of
bitmap images you can use for map backgrounds. The file — called “images.exe” — is
located in the \NetSight Element Manager\Bin directory; double-clicking on this file will
extract the bitmap images.