


Creating Network Maps
6-16 Building Your Network Map
2. In the Root Map Name field, enter the name you’d like to assign to the root
map of your hierarchy. This will be the map that contains the submap icons for
each submap that is created; it can be an entirely new map, or you can enter
(or use the Browse button to locate) an existing map.
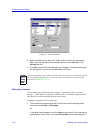
3. The Subnets list box lists each of the submaps that will be created, along with
the default name that has been assigned to each, and the subnet whose
devices it will contain. You can edit this default setup as follows:
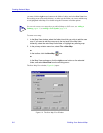
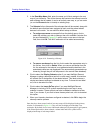
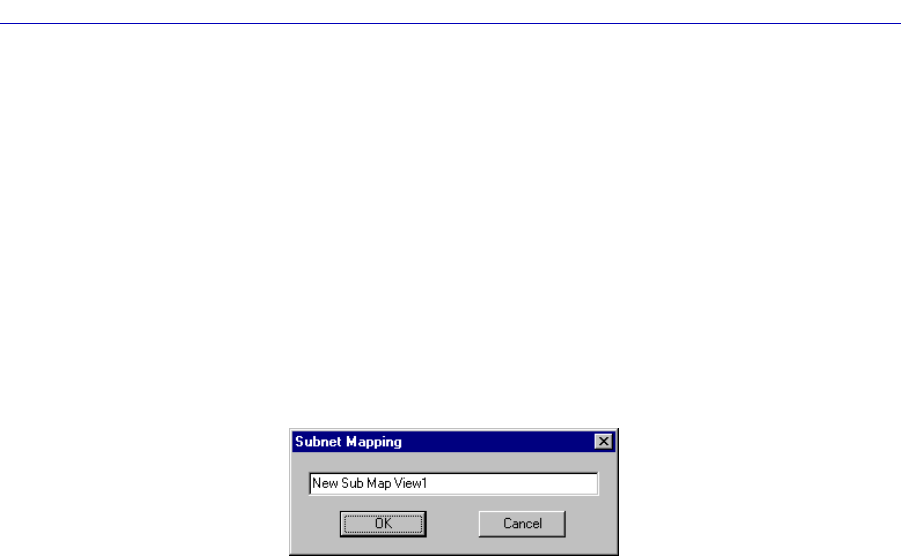
a. To assign map names more specific than the default name, click to
select the submap you wish to change, then click on Edit. A window like
the one illustrated in Figure 6-10 opens; enter a new name in the text
field, then click OK. The .MAP extension will be added automatically.
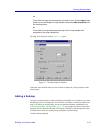
Figure 6-10. Renaming a Submap
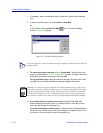
b. To remove a submap from the list, click to select the appropriate entry in
the list box, then click on Delete. When you remove a submap from the
list, the submap for that subnet is not generated and the devices in the
associated subnet are not displayed in the automatically-generated map
hierarchy (though they will still be present in the central node database).
4. Click to select the Display Subnets option if you want NetSight Element
Manager to place a descriptive text box in each map it creates; this text box
will contain the IP designation of the related subnet. This label exists as a
simple text element and can be deleted at any time. To leave this text label
out, click to de-select the field.
5. Click to select the Insert GoTos option if you want NetSight Element
Manager to include a GoTo symbol representing the root map in every
submap it creates. These symbols can also be added or deleted at a later
time, if you choose. If you wish to leave these symbols out, click to de-select
this option.
6. When your hierarchy has been configured as desired, click OK to begin the
submap creation process.
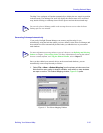
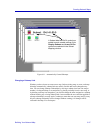
Once they have been created, each of your new maps will be displayed in the primary
window, as illustrated in Figure 6-11; they will also be displayed in the Map View
workspace. By default, device icons within each submap will be arranged in a grid pattern;
if the related options have been selected, a subnet label and GoTo symbol will be
displayed at the top of each map window.