


The Discover Process 3-17
Discovering Nodes
NEW and SECONDARY Discovers
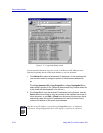
Discovery sessions are divided into two types: NEW and SECONDARY. The first time
you run a device discover script, all IP addresses in the subnet or address range you have
specified will be queried, and all discovered devices will be listed in the discover window
and automatically added to the central node database. This is called a NEW Discovery.
The second time you run any device discover, however — even a device script which has
not yet been run — NetSight Element Manager will perform a SECONDARY Discover,
querying only those IP addresses which did not respond to the first discover.
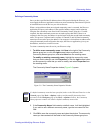
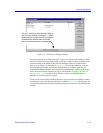
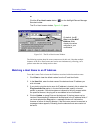
Stopping a Discover in Progress
1. Select File—>Exit from the Network Discover window’s menu bar.
or
Click the close button in the upper-right corner of the Network Discover
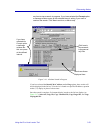
window. A message window like the one illustrated in Figure 3-13 opens.
Figure 3-13. Cancel Discover Confirmation Window
2. Click Yes to stop the discover and add any discovered nodes to the database;
click No to stop the discover without adding any partial results to the
database; or click on Cancel to continue the discover.
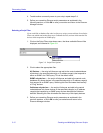
Restarting a Completed Discover
You can also re-start a completed discover from the Discover window; note that this will
launch the selected script in SECONDARY discover mode, unless the discover counter
has been reset.
1. In the Network Discover window, select File—>Rediscover. The original
discover script will be re-launched, in SECONDARY discover mode.
TIP
When a NEW Discovery is performed, new information which may be discovered about an
IP address will not overwrite the information about that address which is currently in the
central node database. For example, if an IP address previously assigned to an EMME is
moved to a SmartSwitch 6000, the discover application does not record this change in the
database.