


4-20
Cisco PGW 2200 Softswitch Release 9.8 Software Installation and Configuration Guide
OL-18083-01
Chapter 4 Configuring the Cisco PGW 2200 Softswitch Software
Configuring SNMP Support Resources
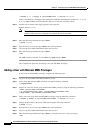
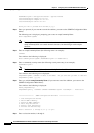
Enter snmpCommunityName:
Step 3 Enter an SnmpCommunityName. Select an SnmpCommunityName from the list that is displayed in
Step 1. The SnmpCommunityName T555, is an example:
T555
Text similar to the following is displayed:
snmpCommunityName: T555 is about to be deleted. Are you sure that you want to delete this
snmpCommunity Name [y]/[n]?
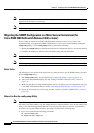
Step 4 Enter y to confirm the deletion (if you enter n to cancel the deletion, you return to the SNMPD
Configuration Main Menu).
Text similar to the following is displayed and you are returned to the SNMPD Configuration Main Menu:
Deleting snmpCommunity= T555
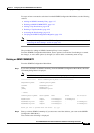
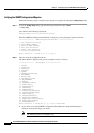
=================== SNMPD Configuration Main Menu ===================
1. View Configuration Entries
2. Add an SNMP Community
3. Delete an SNMP Community
4. Add a Trap Destination
5. Delete a Trap Destination
6. Activate the New Settings
Enter a selection (1 through 6) or 'q' to quit:
Step 5 Enter your selection. For detailed procedures for your selection, refer to the following list:
• Adding an SNMP Community Entry, page 4-17
• Deleting an SNMP COMMUNITY, page 4-19
• Adding a Trap Destination, page 4-20
• Deleting a Trap Destination, page 4-22
• Activating the New Settings, page 4-23
• Verifying the SNMP Configuration Migration, page 4-24
The procedure for deleting an SNMP Community Entry is now complete. Proceed to the selection you
entered in the SNMPD Configuration Main Menu.
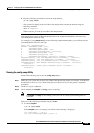
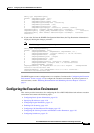
Adding a Trap Destination
From the SNMPD Configuration Main Menu:
Step 1 Select option 4 (Add a Trap Destination) from the SNMPD Configuration Main Menu and press Enter
to add a Trap Destination.
The Add Trap Menu is displayed:
Note The IP Address (Target Address) listed below is an example of existing Trap entries.