


5-16
Cisco PGW 2200 Softswitch Release 9.8 Software Installation and Configuration Guide
OL-18083-01
Chapter 5 Migrating to Solaris 10 and Cisco PGW 2200 Softswitch Software Release 9.8
Migration from Release 9.5 or 9.6 to Release 9.8 without Platform Changes
mml> rtrv-c7lnk:all
mml> rtrv-iplnk:all
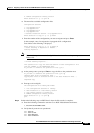
Step 11 Enter the following command on the standby host to verify that call replication is occurring between
PGW hosts 1 and 2:
mml> rtrv-tc:all
Text similar to the following is displayed:
----------rtrv-tt-database--------
# numan-rtrv:cliprefix:clisetname="1111",cliprefix="1"
# numan-rtrv:announcement:annId=1,gwtype="AS5400"
# numan-rtrv:porttbl:digitstring="100034"
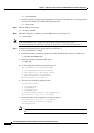
Step 12 You have now completed upgrading PGW host 1 to the Release 9.8 software. Enter the following
command to promote PGW host 1 to active:
mml> sw-over::confirm
Step 13 When the switchover is complete, enter the following command to verify that PGW host 1 is processing
calls.
mml> rtrv-tc:all
Note If the call replication fails, or if new Active Host is not processing calls, see the
Cisco PGW 2200 Softswitch Release 9 Operations, Maintenance, and Troubleshooting Guide.
Step 14 Restart PGW host 2 in order to ensure that the changes to the pom.dataSync variable take effect.
Transferring Additional Configuration Files
If you need to transfer additional configuration files, follow these steps, using the config-lib tool:
Step 1 Set the pom.dataSync variable to False on both Cisco PGW 2200 Softswitch hosts. To view or modify
the pom.dataSync variable, use an editor such as vi to edit /opt/CiscoMGC/etc/XECfgParm.dat.
Step 2 Restart the active and standby Cisco PGW 2200 Softswitch hosts sequentially to ensure that the changes
to the pom.dataSync variable take effect.
Step 3 Complete the following steps to migrate the files to PGW host 2:
a. Log in to PGW host 2 as root.
b. Enter the following command to stop the Cisco PGW 2200 Softswitch software on PGW host 2:
# /etc/init.d/CiscoMGC stop
c. Run the config-lib application:
# config-lib
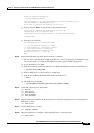
d. At the configuration file library main menu, enter 3 and press Enter.
The Configuration File Library Main Menu
1. List Configuration Versions in Library
2. Save Production to a new Library Version
3. Copy Library Version to Production