


xStack DGS-3600 Series Layer 3 Gigabit Ethernet Managed Switch CLI Manual
234
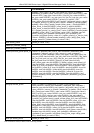
config access_profile profile_id (packet content)
Parameters profile_id <value 1-14> - Enter an integer between 1 and 14 that is used to identify the
access profile that will be configured with this command. This value is assigned to the
access profile when it is created with the create access_profile command. The lower the
profile ID, the higher the priority the rule will be given.
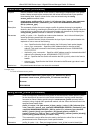
add access_id - Adds an additional rule to the above specified access profile.
• auto_assign – Adding this parameter will automatically assign an access_id to
identify the rule.
• <value 1-128> - The value specifies the relative priority of the additional rule. Up
to 128 different rules may be configured for the Ethernet access profile.
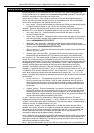
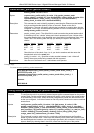
offset_chunk_1 – The offset field is used to examine the packet header which is divided up
into 4 “chunks” where each chunk represents 4 bytes. Values within the packet header
chunk to be identified are to be marked in hexadecimal form in the “mask” field. The
following table will help you identify the bytes in the respective chunks.
chunk0
chunk1 chunk2…….. chunk29 chunk30 chunk31
b126 b2 b6 b114 b118 b122
b127 b3 b7 b115 b119 b123
b1 b4 b8 b116 b120 b124
Check the box of the chunk, from 1-4, you wish to examine and then enter the hexadecimal
value in the mask field.
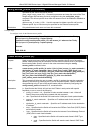
port <portlist> | all - The access profile for IP may be defined for each port on the Switch. Up
to 128 rules may be configured for each port. Selecting all will configure this rule for all ports
on the Switch. The port list is specified by listing the lowest switch number and the beginning
port number on that switch, separated by a colon. Then the highest switch number, and the
highest port number of the range (also separated by a colon) are specified. The beginning
and end of the port list range are separated by a dash. For example, 1:3 specifies switch
number 1, port 3. 2:4 specifies switch number 2, port 4. 1:3-2:4 specifies all of the ports
between switch 1, port 3 and switch 2, port 4 − in numerical order. Non-contiguous portlist
entries are separated by a comma. (ex: 1:1-1:3,1:7-1:9)
permit – Specifies that packets that match the access profile are permitted to be forwarded
by the Switch.
• priority <value 0-7> − This parameter is specified to re-write the 802.1p default priority
previously set in the Switch, which is used to determine the CoS queue to which
packets are forwarded to. Once this field is specified, packets accepted by the Switch
that match this priority are forwarded to the CoS queue specified previously by the
user.
• {replace_priority} − Enter this parameter to re-write the 802.1p default priority of a
packet to the value entered in the Priority field, which meets the criteria specified
previously in this command, before forwarding it on to the specified CoS queue.
Otherwise, a packet will have its incoming 802.1p user priority re-written to its original
value before being forwarded by the Switch.
replace_dscp <value 0-63> − Allows the user to specify a value to be written to the DSCP
field of an incoming packet that meets the criteria specified in the first part of the command.
This value will over-write the value in the DSCP field of the packet.
rx_rate - Use this to limit Rx bandwidth for the profile being configured. This rate is
implemented using the following equation – 1 value = 64kbit/sec. (ex. If the user selects a rx
rate of 10 then the ingress rate is 640kbit/sec.) The user many select a value between 1-
156249 or no limit. The default setting is no limit.
counter [enable | disable] – Use this parameter to enable the counter function. When
enabled, this counter will count the number of packets that match the profile stated with this
command. If the counter command is enabled using the flow_meter command, the conter
command here will be overridden and therefore will not count packets. This command is
optional and the default setting is disabled.
mirror - Selecting mirror specifies that packets that match the access profile are mirrored to
a port defined in the config mirror port command. Port Mirroring must be enabled and a
target port must be set. Remember, Port Mirroring cannot cross-box, that is they cannot
span across switches in a switch stack.