


Chapter 11 System Management
11.2 Functions in the Action Area for System
ETERNUS Web GUI User’s Guide
Copyright 2013 FUJITSU LIMITED P2X0-1090-10ENZ0
801
The procedure to specify the Remote Support settings is as follows:
Procedure
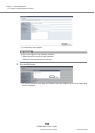
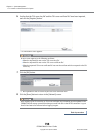
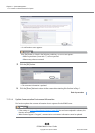
1 Click [Setup Remote Support] in [Action].
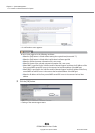
2 Specify the parameters, and click the [Set] button.
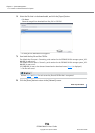
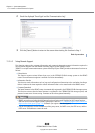
● Information File
• Customer Information File
Import the "customer information file", which was created using the REMCS ESAT, to the ETERNUS DX
Disk storage system.
Click the [Browse...] button to specify the "customer information file", or directly input the path to
the "customer information file".
• Customer Information File
Import the "communication environment information file", which was created using the REMCS
ESAT, to the ETERNUS DX Disk storage system.
Click the [Browse...] button to specify the communication environment information file, or directly
input the path to the communication environment information file.
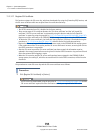
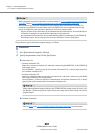
● Customer Information
• When changing the registered information, use the procedure in "11.2.4.3 Update Customer Information"
(page 805) and the "11.2.4.4 Update Communication Environment Information" (page 808).
• The information files (customer information file and communication environment information file)
created by using REMCS Environment Setup Assist Tool (REMCS ESAT) can be imported to the storage
system, to simplify the input operation required to be set for each storage system.
- Only the common device information can be imported from the information file. The individual device
information is required to be specified after importing the information file.
- Just importing the information file will not automatically update the information in the ETERNUS DX
Disk storage system. After specifying all the necessary information, click the [Set] button.
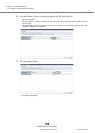
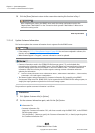
When importing Remote Support settings to the ETERNUS DX Disk storage system all at once, click
the [Browse...] button to specify the location where the settings file has been stored, and click the
[Import] button.
Refer to Step 2 in the "11.2.4.3 Update Customer Information" (page 805) for setting items.