


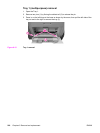

NOTE
When performing any servicing inside the printer, all four print cartridges should be removed.
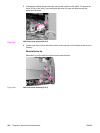
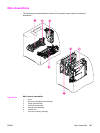
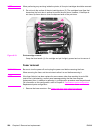
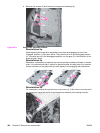
2. Do not touch the surface of the print cartridge drum (2). The cartridges have flaps that
close when the front door is opened to protect the print drum. However, if the flaps do
not close, flip them down to cover the exposed area of the print drum.
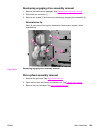
Figure 6-19.
Print cartridge removal
Grasp the blue handle (1) of a cartridge and pull it slightly upward and out to remove it.
Fuser removal
WARNING!
Be sure to turn the power off and unplug the power cord before removing the fuser.
When removing the fuser, wait ten minutes to allow it to cool before removing it.
NOTE
If the fuser failed or has been replace for some reason other than reaching its end-of-life
(end-of-life is indicated by a control panel message stating that the fuser requires
replacement) then, in addition to replacing it, a configuration procedure must be performed.
For information on this configuration, refer to Chapter 8,
Replacement parts configuration
Replacement parts configuration.
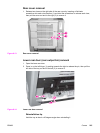
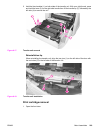
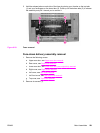
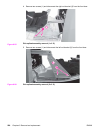
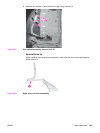
1. Remove the lower rear door. See
Lower rear door (rear output bin) removal.
220 Chapter 6 Removal and replacement ENWW