


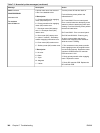


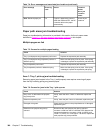

DC Controller (previously installed in another printer)
replacement configuration
To ensure optimum print quality, the printer needs to be calibrated by performing 3 Calibrate
Now's using the printer control panel by selecting CONFIGURE DEVICE / PRINT QUALITY /
CALIBRATE NOW, see
Calibrate Now.
Light intensity of the media sensor must be adjusted. Follow the procedure below to adjust
the light intensity.
1. Turn the printer OFF.
2. Open the front cover.
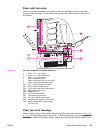
3. While pressing the engine test print switch on the left side of the printer (see
Figure
7-16. Location of solenoids and clutches), turn the printer ON.
4. Close the front cover.
5. Load plain white paper in the multi-purpose tray.
6. As the printer goes into READY period, press the engine test print switch and test print.
7. One sheet of paper will be fed into the printer from the multipurpose tray and will be
delivered to the face-down delivery tray.
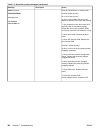
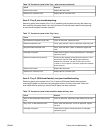
The Transfer Kit count is set when it is first placed in a printer by a back up value contained
on the formatter. If using a DC Controller that was previously installed in another printer, the
Transfer Kit count will be set to the count of the first printer the DC Controller was installed
in. The Transfer Kit count cannot be reset in the Service Menu. The Transfer Kit count can
be reset to zero by setting CONFIGURE DEVICE / RESETS / RESET SUPPLIES / NEW
TRANSFER KIT = YES. (Resetting the Transfer Kit count to zero after it has been used will
result in using the Transfer Kit past it's specified life which may result in a failure before low
is reached.)
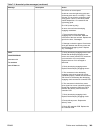
NOTE
For the HP Color LaserJet 3700 series printer, a non-duplexing printer can obtain the ability
to duplex if the DC Controller was previously installed in a 3700 printer that had duplexing.
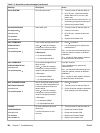
Media sensor (PS5) replacement configuration
Light intensity of the media sensor must be adjusted. Follow the procedure below to adjust
the light intensity.
1. Turn the printer OFF.
2. Open the front cover.
3. While pressing down the engine test print switch on the left side of the printer, turn the
printer ON.
4. Close the front cover.
5. Load plain white paper in the multi-purpose tray.
6. As the printer goes into READY period, press the engine test print switch and test print.
7. One piece of paper will be fed into the printer from the multipurpose tray and will be
delivered to the face down delivery tray.
354 Chapter 7 Troubleshooting ENWW