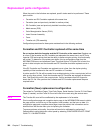
Color Misregistration Sensor (PS12) replacement
configuration
To ensure optimum print quality, the printer will need to be calibrated by performing 3
Calibrate Now's using the printer control panel by selecting CONFIGURE DEVICE / PRINT
QUALITY / CALIBRATE NOW.
Laser/scanner Assembly replacement configuration
To ensure optimum print quality, the printer will need to be calibrated by performing 3
Calibrate Now's using the printer control panel by selecting CONFIGURE DEVICE / PRINT
QUALITY / CALIBRATE NOW.
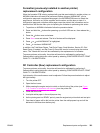
Fuser replacement configuration
Under normal circumstances, the printer will prompt you to order a new fuser when the
control panel reads ORDER FUSER KIT. This message indicates the fuser is nearing its end
of life. When you replace a fuser under these circumstances, the control panel will not
automatically prompt you to reset the fuser count. If you continue printing with the ORDER
FUSER KIT message it will eventually covert to the REPLACE FUSER KIT message. At that
time printing is stopped and a new fuser must be installed. When you replace a fuser under
these circumstances, the control panel automatically prompts you to reset the fuser count
after you have installed the new fuser.
If you replace the fuser for any reason before the control panel reads REPLACE FUSER
KIT, for instance if the fuser is defective, you will need to reset the fuser count manually
through the control panel.
The Fuser Kit count can be reset to zero by setting CONFIGURE DEVICE / RESETS /
RESET SUPPLIES / NEW FUSER KIT = YES.
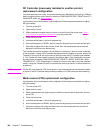
Transfer unit (ITB assembly) replacement configuration
Under normal circumstances, the printer will prompt you to order a new transfer unit when
the control panel reads ORDER TRANSFER KIT. This message indicates the transfer unit is
nearing its end of life. When you replace a transfer unit under these circumstances, the
control panel will not automatically prompt you to reset the transfer unit count. If you
continue printing with the ORDER TRASFER KIT message it will eventually covert to the
REPLACE TRANSFER KIT message. At that time printing is stopped and a new transfer unit
must be installed. When you replace a transfer unit under these circumstances, the control
panel automatically prompts you to reset the transfer unit count after you have installed the
new transfer unit.
If you replace the transfer unit for any reason before the control panel reads REPLACE
TRANSFER KIT, for instance if the transfer unit is defective, you will need to calibrate the
printer and reset the transfer unit count manually through the control panel.
To ensure optimum print quality, the printer will need to be calibrated by performing 3
Calibrate Now's using the printer control panel by selecting CONFIGURE DEVICE / PRINT
QUALITY / CALIBRATE NOW.
The Transfer Kit count can be reset to zero by setting CONFIGURE DEVICE / RESETS /
RESET SUPPLIES / NEW TRANSFER KIT = YES.
ENWW Replacement parts configuration 355


