


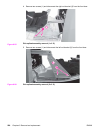
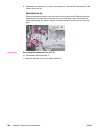
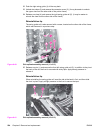
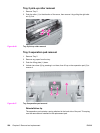
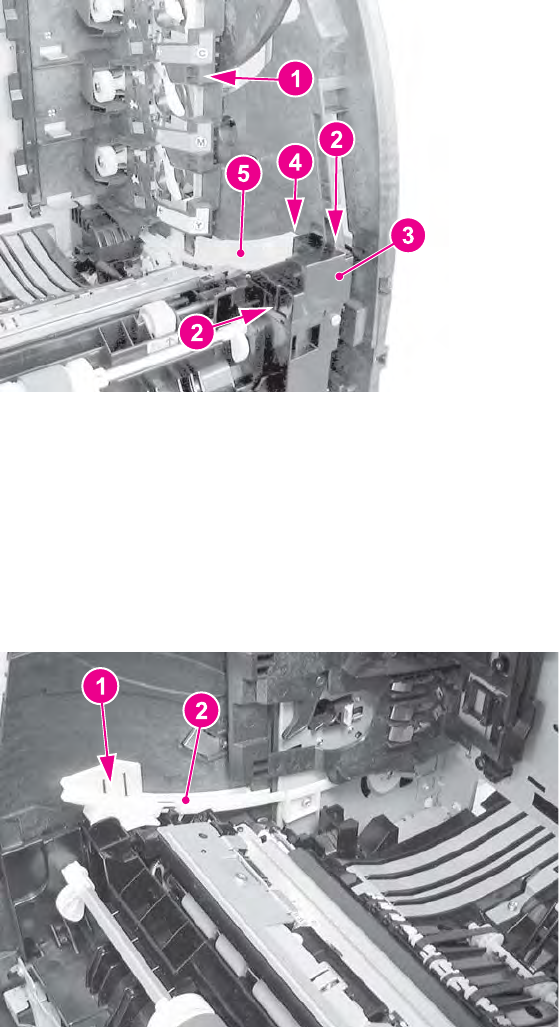
22. Push the right swing guide (1) all the way back.
23. Unhook two claws (2) and remove the connector cover (3). (It may be easier to unhook
the upper claw from the other side of the printer frame.)
24. Release one claw (4) and remove the right swing guide rail (5). (It may be easier to
unhook the claw from the other side of the frame.)
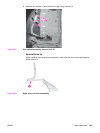
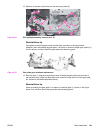
Reinstallation tip
The swing guide rail is also secured with a screw, located on the other side of the frame,
which was removed in a previous step.
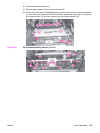
Figure 6-40.
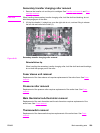
Pick-up/feed assembly removal (11 of 13)
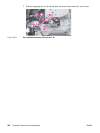
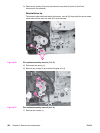
25. Release one pin (1) and remove the front left swing guide rail (2). In addition to the pin at
the back of the rail, the front is secured with sticky tape. Apply steady pressure to
release it.
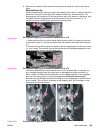
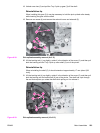
Reinstallation tip
When reinstalling the swing guide rail, insert the tab at the back in first, and then slide
the front in place. Apply a slight pressure to the front to secure the tape.
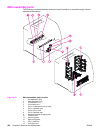
Figure 6-41.
Pick-up/feed assembly removal (12 of 13)
234 Chapter 6 Removal and replacement ENWW