


e-STUDIO3511/4511 DRIVE SYSTEM 9 - 14 November 2003 © TOSHIBA TEC
9
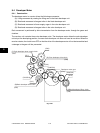
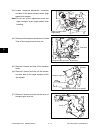
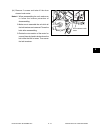
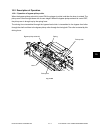
(12) Remove clip A (back side of the unit), gear A
with the shaft and 2 bushings. Remove clip B
(back side of the unit), gear B with the shaft, 2
bushings, and gear C between the metal plates
of the drive unit.
Fig. 9-524
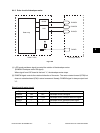
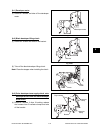
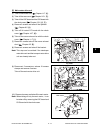
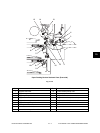
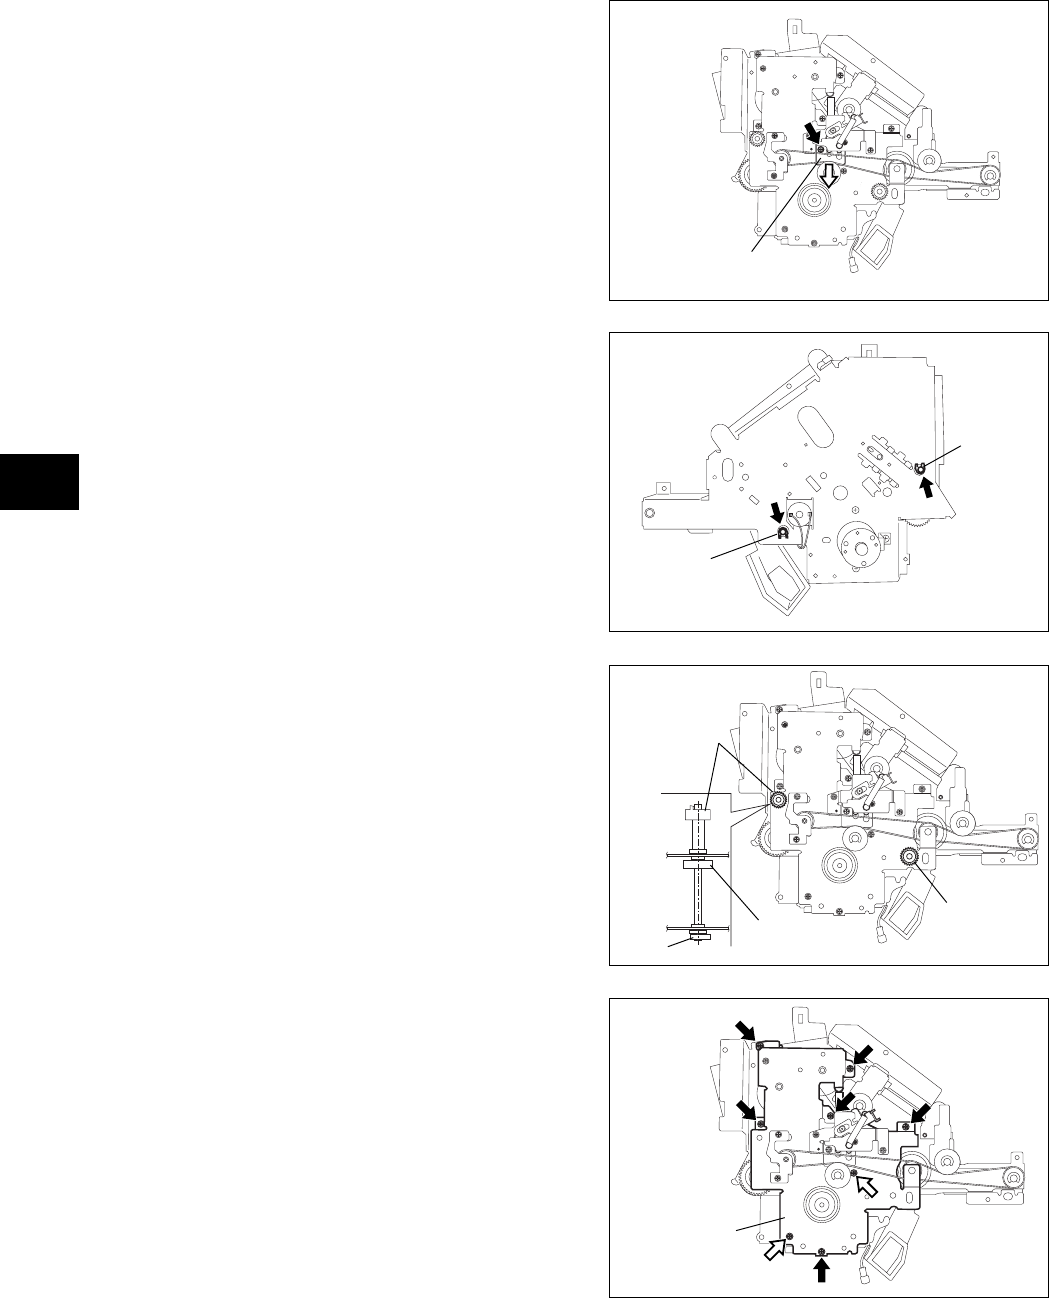
(13) Remove 8 screws (denoted with the white
arrows are the plastic screws) and take off
the plate cover.
Fig. 9-525
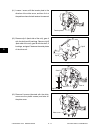
Fig. 9-526
Clip A
Clip B
Gear B
Gear C
Gear A
Clip B
Plate cover
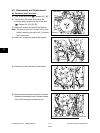
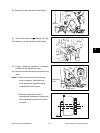
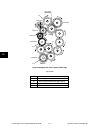
(11) Loosen 1 screw, shift the tension plate to the
direction of the white arrow, and then fix it at
the position where the belt tension is loosened.
Fig. 9-523
Tension plate