


16
e-STUDIO3511/4511 FUSER UNIT/PAPER EXIT SECTION 16 - 20 November 2003 © TOSHIBA TEC
Fig. 16-720
Fig. 16-719
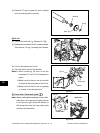
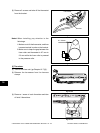
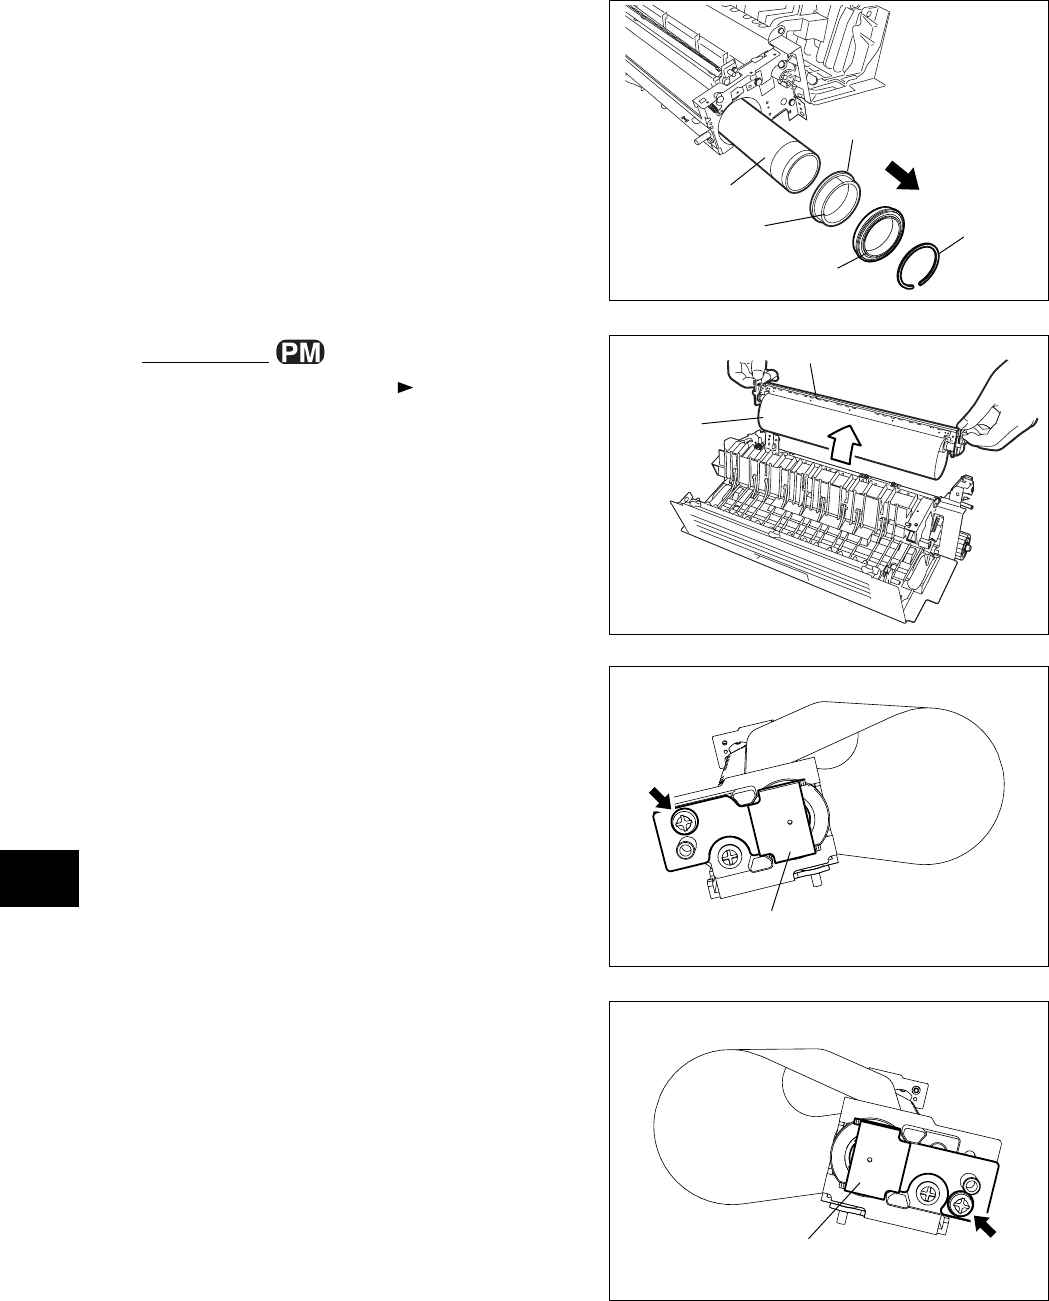
(4) Remove 1 screw and take off the bracket on
the rear side.
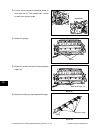
Fuser belt unit
Fig. 16-718
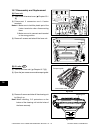
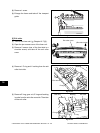
[F] Fuser belt
(1) Take off the fuser roller ( Chapter 16.7 [E]).
(2) Lift up the fuser belt unit and take it off.
Note: Be careful not to scratch the fuser belt. Lay
the fuser belt on the clean place to prevent
the belt from the dust.
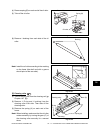
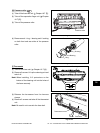
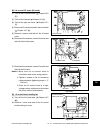
(3) Remove 1 screw and take off the bracket on
the front side.
Bracket
Bracket
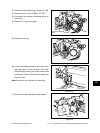
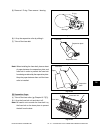
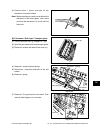
(8) Take off the fuser roller.
(9) Remove 1 C-ring, 1 bearing and 1 fuser belt
guide from the fuser roller front side.
Note: When installing, make sure that the fuser belt
guide securely fits in the fuser roller groove.
Also, make sure that the ring on the fuser
belt guide securely fits in the groove on the
belt restricting plate.
Fig. 16-717
Fuser roller
Fuser belt guide
C-ring
Ring
Bearing
Fuser belt
- Front -
- Rear -