


e-STUDIO3511/4511 REVOLVER UNIT 13 - 8 November 2003 © TOSHIBA TEC
13
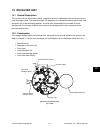
Fig. 13-705
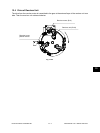
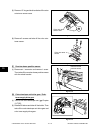
[D] Color toner cartridge sensor
(1) Take off the receiving tray ( Chapter 2.5.1
[B]).
(2) Disconnect 1 connector and remove 1 screw
and take off the color toner cartridge sensor
with the whole bracket.
Color toner cartridge
sensor
Connector
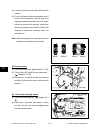
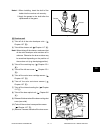
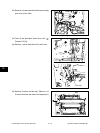
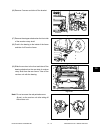
(4) Loosen 2 screws on each holder and take off 2
holders.
(5) Pull out and take off the color developer unit. If
the other color developer units still need to be
replaced, repeat the procedure (3) to (5). When
rotate the revolver unit manually, push down
the revolver lock lever and rotate it a little in the
direction of white arrow, and then follow the
procedure “a”.
Note: When installing the color developer unit, pay
attention to the direction of the holder.
Fig. 13-703
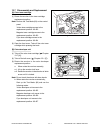
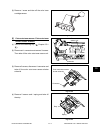
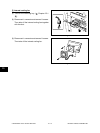
[C] Revolver motor
(1) Take off the rear cover ( Chapter 2.5.1 [P]).
(2) Take off the LGC board with the whole case
( Chapter 2.5.2 [A]).
(3) Disconnect 1 connector and remove 4 screws
and take off the revolver motor with the whole
bracket.
Connector
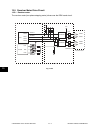
Fig. 13-704
[FRONT][REAR] [FRONT][REAR]