


e-STUDIO3511/4511 TRANSFER/TRANSPORT UNIT 14 - 16 November 2003 © TOSHIBA TEC
14
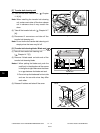
Fig. 14-739
Fig. 14-740
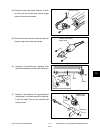
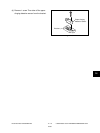
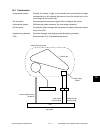
(4) Remove each part from the 2nd transfer
roller in order.
Notes:1. When assembling, pay attention to the
direction of the collar-2.
2. After assembling, check if the bushing-1,
bearing and collar-2 slide smoothly along
the axis of the shaft.
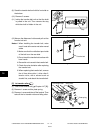
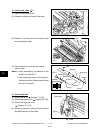
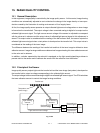
[J] 2nd transfer unit
(1) Take off the ADU ( Chapter 17.5 [A]).
(2) Take off the bypass unit ( Chapter 10.4 [A]).
(3) Take off the right rear cover
( Chapter 2.5.1 [L]).
(4) Remove 2 clips and 1 spring, and then take off
the slide hinge on the front side.
Collar-1
Spring
Bushing-2
Collor-3
Slide hinge
Spring
Clip
Fig. 14-737
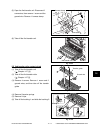
Fig. 14-738
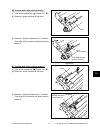
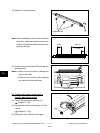
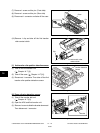
[I] 2nd transfer roller
(1) Open the 2nd transfer unit.
(2) Release 4 latches and take off the cover.
(3) Remove 1 clip. Take off the 2nd transfer roller
while pushing the shaft.
Cover
Clip
2nd transfer
roller
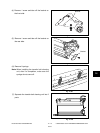
04/10
Clip
Collar-1
Bearing
Bearing
Bushing-1
Collor-2
Washer
Washer