


November 2003 © TOSHIBA TEC 11 - 13 e-STUDIO3511/4511 DRUM RELATED SECTION
11
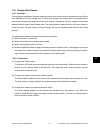
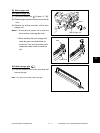
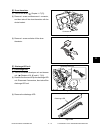
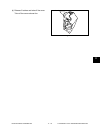
(3) Take off the drum upward by sliding it toward
the front side.
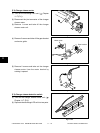
Notes: 1. Do not touch, scratch or spit on the drum
surface.
2. Try to avoid direct sunlight to the drum.
Lay it on the dark place immediately after
taking off.
3. Do not touch the drum thermistor during
the disassembly and replacement.
4. Do not touch or damage the edge of the
cleaning blade.
5. When replacing the drum, take off the
drum shaft bearing from the old drum and
install it on the new drum.
6. Check the color deviation after replacing
the drum.
Fig. 11-717
Drum
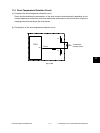
[C] Drum
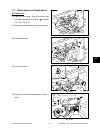
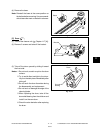
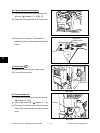
(1) Take off the cleaner unit ( Chapter 11.7 [A]).
(2) Remove 3 screws and take off the bracket.
Bracket
Fig. 11-716
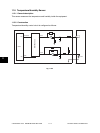
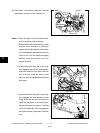
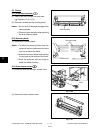
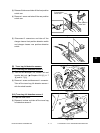
(4) Remove the base.
Note: Reinstall the base at the same position on
the belt as before removing. It is recommend-
able to leave the mark on the belt in advance.
Fig. 11-715
Base
Drum shaft
bearing
04/10