Calibration and Verification
Determining Test Limits for Other Calibration Intervals
3
3-49
Example 1 shows you how to calculate a specification limit for a specific test level from
a specification listed as a percentage (or parts per million) of reading plus a floor error in
microvolts, millivolts, miroamps, or nanoamps.
The 99% confidence specification for a 5720A at 2 mA, 1 kHz is 130 ppm + 40 nA. We
can convert the floor uncertainty of 40 nA to ppm of output by dividing 40 nA by 2 mA
and multiplying by a million:
(130 + 1000000*0.000000040/0.002)=130 ppm + 20 ppm = 150 ppm
This test limit is shown in Table 3-28.
If we wanted to test to the 1 year specification of 140 ppm + 40 nA, the test limit would
be the specification of 140 ppm + 40 nA = 140 ppm + 40 ppm = 180 ppm.
Example 2 shows you how to calculate a specification limit and a tighter test limit. For
instrumentation that have the precision of the 5720A/5700A Series II calibrators, it is
difficult obtain standards which are many times more accurate than the calibrator
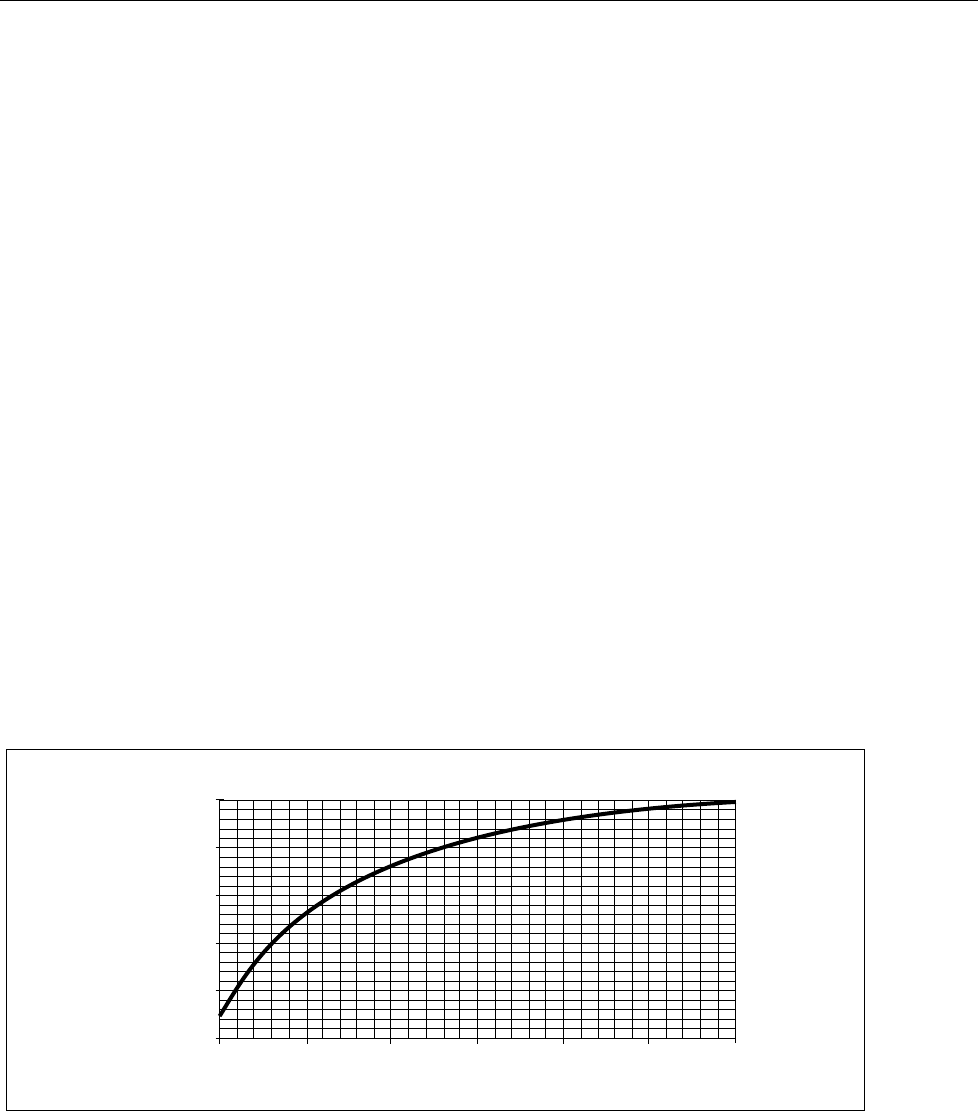
specifications. Therefore, for cases when the test uncertainty ratio (TUR) of the
standards is less than 4:1, guardbanding is used to set test limits which are tighter than
the specification limits. These limits provide the same risk of accepting out of tolerance
instruments as a TUR of 4:1. The statistical analysis of the guardbanding techniques
used are described in a series of technical papers referenced at the end of this chapter.
Guardbanding is used to set the test limits different than the specification limits for a
5720A at 2V, 1 kHz. The 90 day specification is 47 ppm + 10 uV. When you calculate
the specification in ppm at the 2V level in the same way as in Example 1, the
specification limit is:
(47 + 1000000*0.000010/2)=47 ppm + 5 ppm = 52 ppm.
99% Confidence Guardband Factors
0.750
0.800
0.850
0.900
0.950
1.000
1.00 1.50 2.00 2.50 3.00 3.50 4.00
Test Uncertainty Ratio
Guardband Factor (K)
CHART.EPS
Figure 3-20. Determining Other Test Limits
