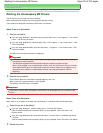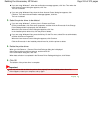
If you are using Windows 7, when the confirmation message appears, click Yes. Then when the
User Account Control dialog box appears, click Yes.
The icon is deleted.
If you are using Windows Vista, when the User Account Control dialog box appears, click
Continue. Then when the confirmation message appears, click Yes.
The icon is deleted.
3.
Select the printer driver to be deleted
If you are using Windows 7, click any icon in Printers and Faxes.
On the commandbar, click Print server properties, and then click the Drivers tab. If the Change
Driver Settings button is displayed, click that button.
When the User Account Control dialog box appears, click Yes.
In the Installed printer drivers list, click the printer to delete.
If you are using Windows Vista, press the Alt key. On the File menu, select Run as administrator,
and then click Server Properties....
When the User Account Control dialog box appears, click Continue.
Click the Drivers tab. In the Installed printer drivers list, click the printer to delete.
4.
Delete the printer driver
When you click Remove..., Remove Driver And Package dialog box is displayed.
Select Remove driver and driver package, and then click OK.
In the confirmation dialog box, click Yes.
When data collection is completed in the Remove Driver Package dialog box, click Delete.
5.
Click OK
The deletion of the printer driver is complete.
Important
You may not be able to delete the printer driver properly from the Installed printer drivers list.
If this happens, restart your computer, and try again.
Page top
Page 913 of 973 pagesDeleting the Unnecessary MP Drivers


