Hardware Replacement 9-37
Octel 200/300 S.4.1PB60019−01
Caution!
To avoid risk of electric shock, wait two minutes
after turning OFF the message server to remove the
PSU.
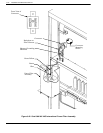
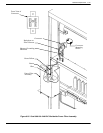
4. Remove the floppy disk drive signal cable from the CPU.
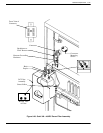
5. Using a flat−blade screwdriver, loosen the two captive screws on the front of the PSU.
6. Gripping the PSU handle, pull the PSU firmly to unseat the rear−mounted connectors. Continue to
pull out the PSU, ready to support the bottom with one hand when it clears the cabinet.
Installing the PSU
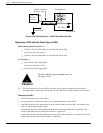
1. Put on an antistatic wrist strap. Connect it to an unpainted portion of the cabinet.
2. Verify that the power supply switch is OFF. The PSU switch is a rocker switch.
On the Octel 200, the PSU switch is OFF when the bottom of the rocker, marked 0, is pressed in. The
switch is ON when the top of the rocker, marked 1, is pressed in.
On the Octel 300, the switch is OFF when the side of the rocker, marked 0, is pressed in. The switch
is ON when the side of the rocker, marked 1, is pressed in.
Caution!
Installing the PSU with the circuit breaker ON and
the power cord attached to the primary power could
damage the PSU or the message server.
3. Pick up the PSU with one hand on the handle and the other hand under the unit to support its weight.
Support the PSU by holding the sheet-metal slider. Do not touch any power supply electrical
components or wiring.
4. Line up the edges of the PSU sheet metal with the card guides and slide the PSU halfway into the
cabinet. Remove your supporting hand from the bottom of the sheet-metal plate.
The Octel 200 PSU slot is marked A10
The Octel 300 PSU slot is marked A15
5. Once again, confirm that the switch is OFF.
6. Gently, but firmly, continue to slide the PSU into the cabinet by pushing on the handle until the
connectors on the back of the unit have mated with the connectors on the motherboard. This is
accomplished when the flange on the front sheet metal of the PSU reaches or very nearly reaches the
sheet metal of the cabinet.
Caution!
Do not slam the PSU into the cabinet. This could
damage the PSU.
7. Using a flat-blade screwdriver, tighten the two captive screws that are attached to the front flange of
the PSU.


