9-48 Installation and Maintenance Volume
Octel 200/300 S.4.1 PB60019−01
Removing the Octel 300 AC Subassemblies
This conversion requires the Octel 300 AC-to-DC power supply conversion kit, part number
740-6100-001, which contains the following:
- DC PSU
- DC filter assembly
- DC backplane harness
To remove the AC subassemblies, use the following procedure:
1. Remove the AC PSU, following the instructions in the Removing the Power Supply section.
2. Remove the VCU and CPU cards from slots A13 and A14, respectively.
3. Remove the AC Power Filter Assembly, following the instructions in the Removing Power Filter
Assembly from the Octel 300 section.
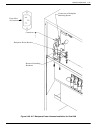
4. Remove the AC filter-to-backplane harness by removing the two screws that hold the connector in
the backplane, as shown in Figure 9-21 for the 120 and 240 VAC or Figure 9-25 for the
100−240 VAC. These screws can be accessed through the front of the chassis. Remove the nuts and
washers that secure the ground wires. Pull the harness out of the message server.
Installing the Octel 300 DC Subassemblies
To install the DC subassemblies, use the following procedure:
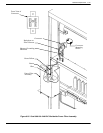
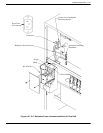
1. Install the DC filter-to-backplane harness, as shown in Figure 9-23.
2. Connect the wires from the backplane harness to the DC filter assembly, as shown in Figure 9-23.
3. Fasten the DC filter assembly to the cabinet, with three screws.
4. Fasten the top panel to the cabinet, with four screws.
5. Reinstall the VCU and CPU cards in slots A13 and A14, respectively.
6. Install the DC PSU, following the instructions in the Installing the Power Supply section.
7. Locate the message server label on the base of the cabinet at the rear. Mark the box on the label
indicating DC power. Remove the mark from the box indicating AC power.
Field Wiring to DC Power Source
Connect the Octel 200/300 to a DC power source as described in the Installation chapter, Installing the
Octel 200/300 With a −48 VDC Power Supply Unit section.


