


Grouping rows
272 DataWindow .NET
Making the
DataWindow control
large enough
If a DataWindow object has grouped rows, each page contains all group
headers (including zero-height headers) at the top of the page. Your
DataWindow control must be large enough to accommodate all the group
headers that display on each page of the report.
The last row of a group displays on the same page as that row's group trailer
and each applicable higher-level group trailer. If the DataWindow object has a
summary band, it displays on the same page as the last row of the report. If the
control is not large enough, you might see anomalies when scrolling through
the DataWindow object, particularly in the last row of the report, which needs
room to display the report's header band, all group headers, all group trailers,
the summary band, and the footer band.
If you cannot increase the height of the DataWindow control so that it has room
for all the headers and trailers, you can change the design of the DataWindow
object so that they require less space.
Scrolling through a
grouped DataWindow
When you scroll through a grouped DataWindow object, you might see the
group header repeated where you do not expect it. This is because the data is
paginated in a fixed layout based on the size of the DataWindow control. You
can scroll to a point that shows the bottom half of one page and the top of the
next. When you use the arrow keys to page through the data, you scroll one row
at a time.
Using the Group presentation style
One of the DataWindow object presentation styles, Group, is a shortcut to
creating a grouped DataWindow object. It generates a tabular DataWindow
object that has one group level and some other grouping properties defined.
You can then further customize the DataWindow object.
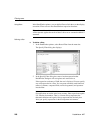
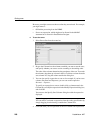
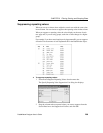
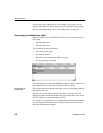
❖ To create a basic grouped DataWindow object using the Group
presentation style:
1 Select File>New from the menu bar.
The New dialog box displays.
2 Choose the DataWindow tab page and the Group presentation style, and
click OK.
3 Choose a data source and define the data.
You are prompted to define the grouping column(s).