Selecting a tree node and navigating the tree
364 DataWindow .NET
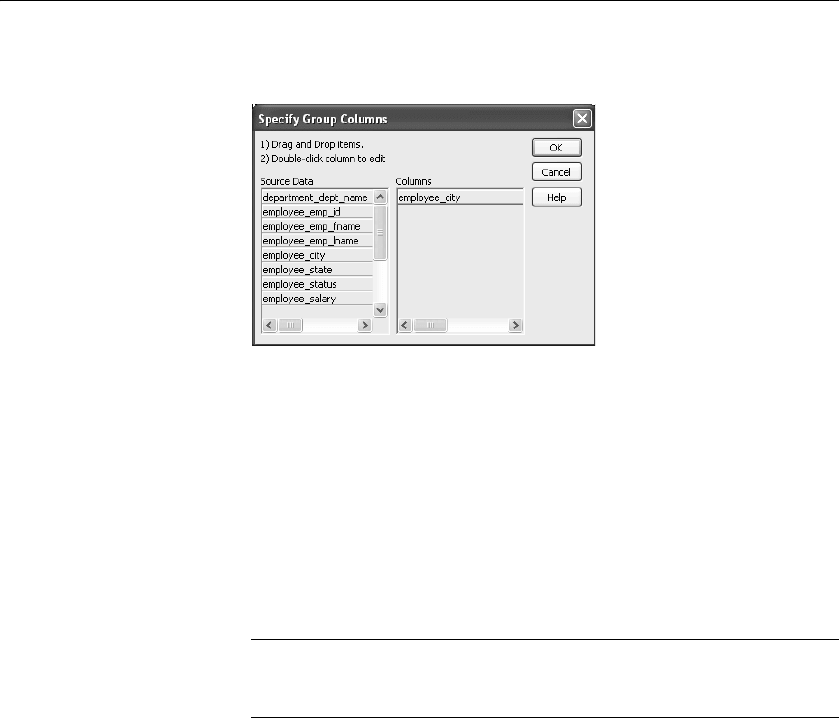
In the sample DataWindow shown in “Example” on page 358, the second
level has a single column, the
employee_city column.
4 Click OK.
The new TreeView level and a Trailer band for that level are created in the
TreeView Design view. For information on how to set properties for a
TreeView level, see “Setting TreeView level properties” on page 369.
❖ To delete a level in a TreeView DataWindow:
1 Select Rows>Delete TreeView Level from the menu bar.
2 Select the number of the level to delete from the list of levels that displays.
The level in the TreeView DataWindow is deleted immediately.
If you delete a level by mistake
If you unintentionally delete a level, close the TreeView DataWindow
without saving changes, then reopen it and continue working.
Selecting a tree node and navigating the tree
You can select a tree node in the TreeView DataWindow by setting the Select
Node By Mouse property to true and then clicking a tree node to select it with
the mouse.
After you select a tree node in the TreeView DataWindow, you can navigate
the tree using the up, down, left, and right keys.


