Firewall Protection
175
ProSafe Gigabit Quad WAN SSL VPN Firewall SRX5308
2. In the Add New Custom IP Group section of the screen, do the following:
• I
n the IP Group Name field, enter a name for the group.
• From the IP Group
Type drop-down list, select LAN Group or WAN Group.
3. Click Appl
y to save your changes. The new IP group is displayed in the Custom IP Groups
Table.
4. I
n the Custom IP Groups Table, click the Edit table button to the right of the IP group that
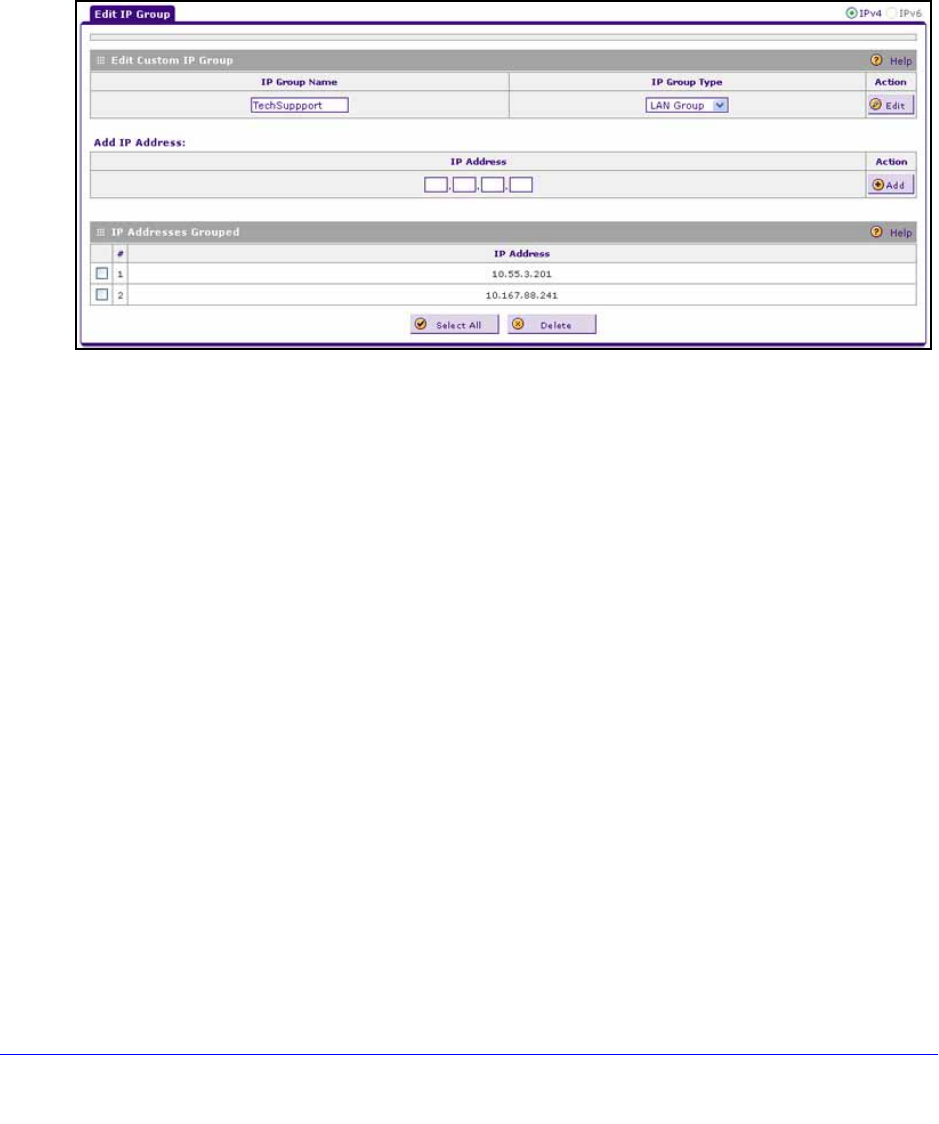
you just created. The Edit IP Group screen displays. (The following figure shows two IP
addresses in the IP Addresses Grouped table as examples.)
Figure 104.
5. In the IP Address fields, type an IP address.
6. Click the Ad
d table button to add the IP address to the IP Addresses Grouped table.
7. Repe
at the previous two steps to add more IP addresses to the IP Addresses Grouped
table.
8. Click the Edi
t table button to return to the IP Groups screen.
To edit an IP group:
1. I
n the Custom IP Groups Table, click the Edit table button to the right of the IP group that
you want to edit. The Edit IP Group screen displays.
2. In t
he Edit New Custom IP Group section of the screen, modify the settings that you wish to
change:
• Y
ou can change the group name.
• Y
ou can change the group type.
• Y
ou can delete an IP address from the IP Addresses Grouped table by selecting the
check box to the left of the IP address that you want to delete and then clicking the
Delete table button. You can delete all IP addresses by clicking the Select All table
button and clicking the Delete table button.
• Y
ou can add IP addresses to the IP Addresses Grouped Table (see Step 4, Step 5, and
Step 6 in the previous procedure).
3. Click the Edi
t table button to return to IP Groups screen.
