LAN Configuration
96
ProSafe Gigabit Quad WAN SSL VPN Firewall SRX5308
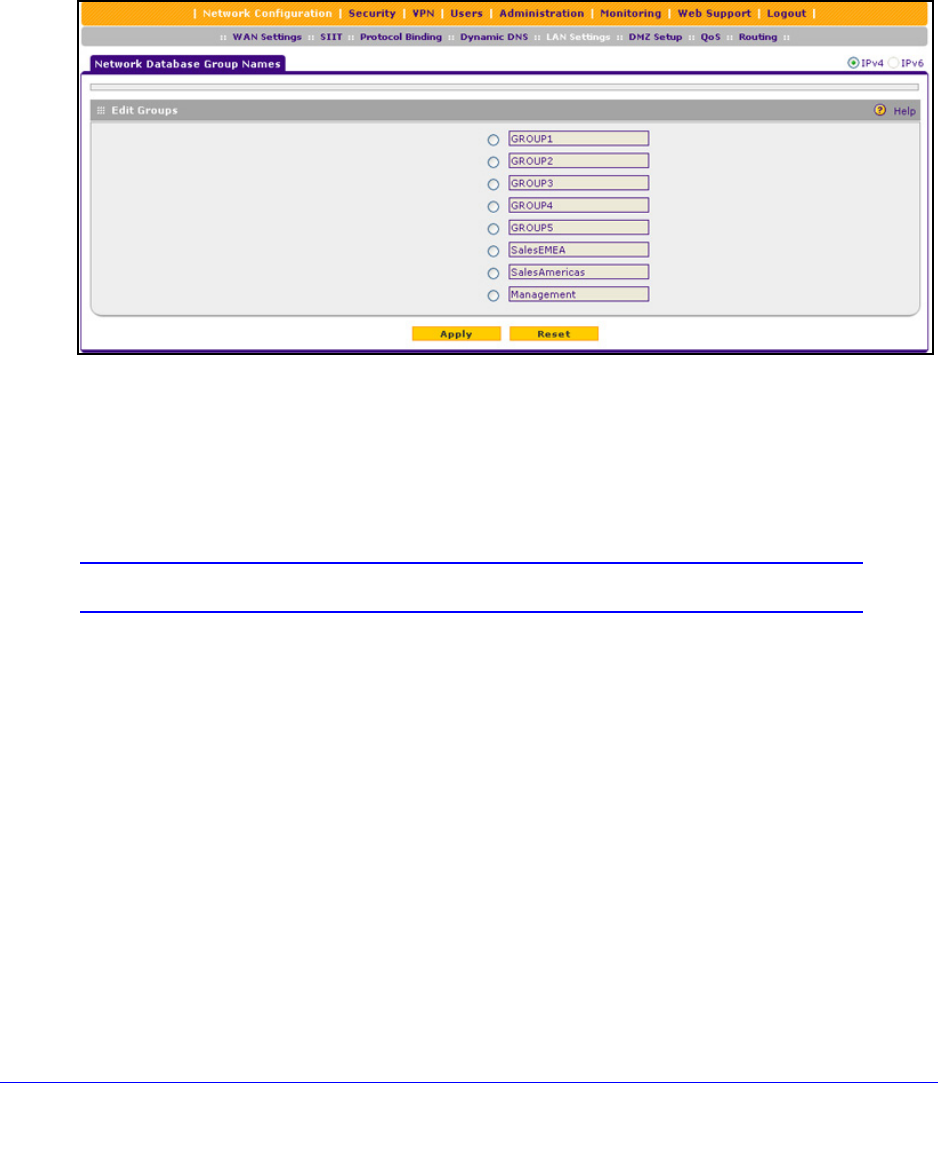
To edit the name of one of the eight available groups:
1. Select Network Configuration > LAN Settings > LAN Groups. The LAN Groups
screen displays (see Figure 52 on
page 93, which shows some examples in the Known
PCs and Devices table).
2. Click the Edit Group
Names option arrow to the right of the LAN submenu tabs. The
Network Database Group Names screen displays. (The following figure shows some
examples.)
Figure 54.
3. Select the radio button next to the group name that you want to change.
4. T
ype a new name in the field. The maximum number of characters is 15. Do not use a
double quote (''), single quote('), or space in the name.
5. Click Apply to save
your settings.
Note: You can change only one group name at a time.
Set Up DHCP Address Reservation
When you specify a reserved IP address for a computer or device on the LAN (based on the
MAC address of the device), that computer or device always receives the same IP address
each time it accesses the VPN firewall’s DHCP server. Reserved IP addresses should be
assigned to servers or access points that require permanent IP address settings. The
reserved IP address that you select needs to be outside of the DHCP server pool.
To reserve and bind an IP address to a MAC address, select Reserved (DHCP Client) from
the IP Address Type drop-down list on the LAN Groups screen and save the binding by
clicking the Save Binding button on the same screen. For detailed steps, see Add Computers
or Devices to the Network Database on page 94.


