RealPresence Collaboration Server (RMX) 1500/2000/4000 Administrator’s Guide
17-8 Polycom, Inc.
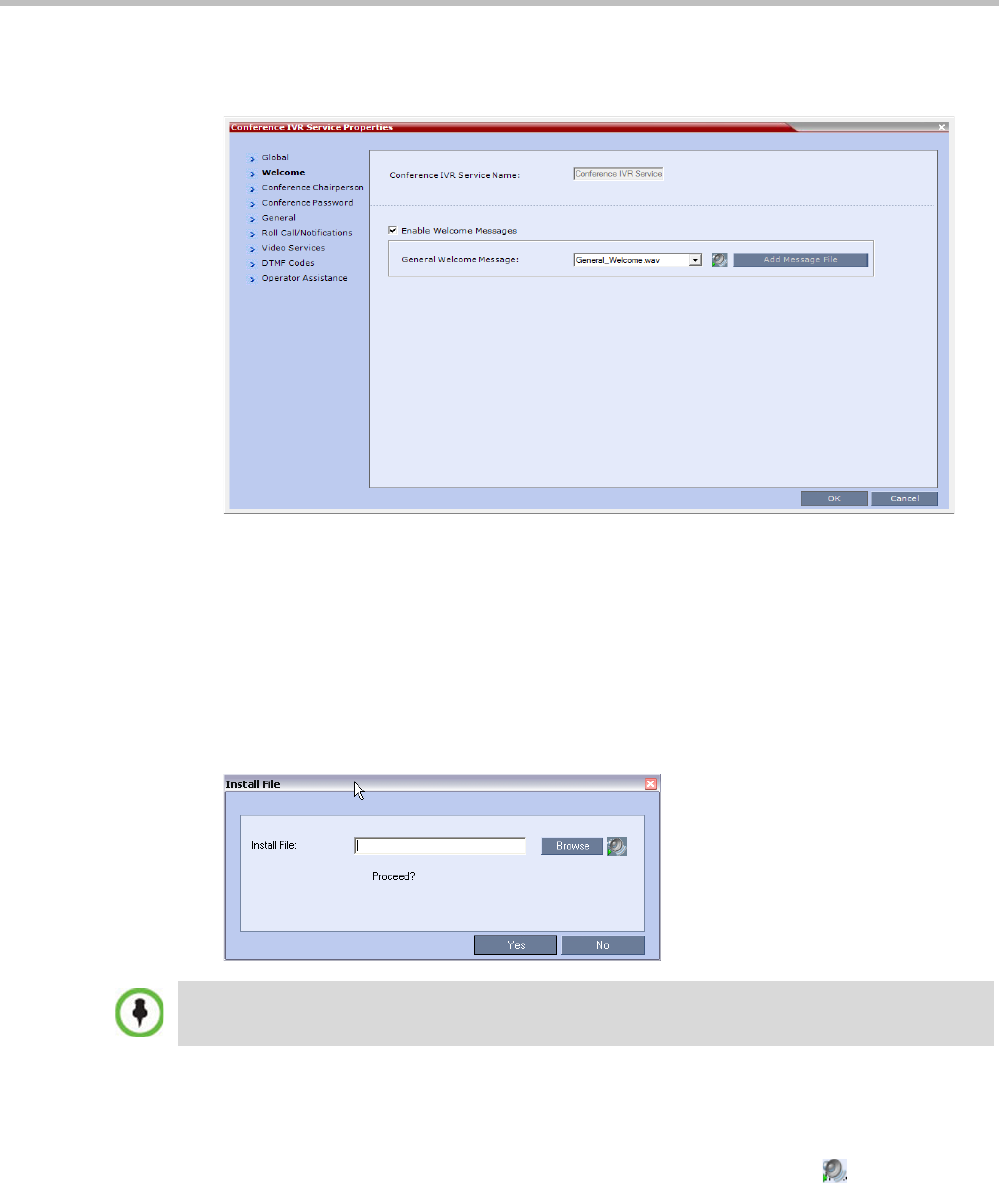
3 Click the Welcome tab.
The New Conference IVR Service - Welcome dialog box opens.
4 Select the Enable Welcome Messages check box to define the system behavior when
the participant enters the Conference IVR queue. When participants access a conference
through an Entry Queue, they hear messages included in both the Entry Queue Service
and Conference IVR Service. To avoid playing the Welcome Message twice, disable the
Welcome Message in the Conference IVR Service.
5 Select the General Welcome Message, to be played when the participant enters the
conference IVR queue.
6 To upload an audio file for an IVR message, click Add Message File.
The Install File dialog box opens.
a Click the Browse button to select the audio file (*.wav) to upload.
The Select Source File dialog box opens.
b Select the appropriate *.wav audio file and then click the Open button.
c Optional. You can play a .wav file by selecting the Play button ( ).
d In the Install File dialog box, click Yes to upload the file to the MCU memory.
The Done dialog box opens.
e Once the upload is complete, click OK and return to the IVR dialog box. The new
audio file can now be selected from the list of audio messages.
The Collaboration Server unit is bundled with default audio IVR message files. To upload a
customized audio file, see "Creating Audio Prompts and Video Slides” on page 17-31.
