


Access Navigator - Release 1.8 August 2003 5-3
Physical Installation
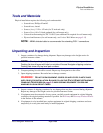
Tools and Materials
Tools and Materials
Physical installation requires the following tools and materials.
• Screwdrivers, Phillips #2 and #3
• Screwdrivers, slotted
• Screws (4 ea.), 12-24 × 1/2 inch (for 23 inch rack only)
• Screws (8 ea.), #8 × 3/4 inch panhead (for wall mount only)
• Universal rack mounting kit, PN 710-0153 (one additional kit required for wall mount only)
• Plywood and fasteners (for wall mount only, see Vertical Wall Mount on page 5-15)
NOTE: ABAM shielded cable is recommended for extending DSX-1 connections.
Unpacking and Inspection
1. Inspect containers for damage during shipment. Report any damage to the freight carrier for
possible insurance claims.
NOTE: Check packing list (taped to outside of container) before opening container.
Packing list should agree with label on outside of Access Navigator shipping container.
Packing lists show only top level part numbers.
2. Compare packing list with office records. Report any discrepancies to the office.
3. Open shipping containers. Be careful not to damage contents.
WARNING! DO NOT OPEN EQUIPMENT COVERS OR ANTI-STATIC PLASTIC BAGS
UNTIL READY FOR INSTALLATION. ALWAYS FOLLOW THE STATIC-SENSITIVE EQUIPMENT
HANDLING PROCEDURES ON page 6-3 WHEN OPENING EQUIPMENT COVERS AND
HANDLING PLUG-IN CIRCUIT CARDS.
4. Inspect contents of shipping containers for any damage that may have occurred during shipment.
Report any damage to the freight carrier for possible insurance claims.
5. If equipment must be returned to for any reason, carefully repack equipment in original shipping
container with original packing materials if possible. See Warranty and Warranty Product Returns
in the Preface of this manual.
6. If equipment is to be installed later, replace equipment in original shipping containers and store
temporarily in a safe place until ready to install equipment.