


38-69
Cisco ASDM User Guide
OL-16647-01
Chapter 38 Clientless SSL VPN
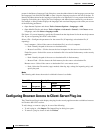
Configuring Browser Access to Client-Server Plug-ins
• vnc-plugin.jar—The Virtual Network Computing plug-in lets the remote user use a monitor,
keyboard, and mouse to view and control a computer with remote desktop sharing turned on. Cisco
redistributes this plug-in without any changes to it per the GNU General Public License. The web
site containing the source of the redistributed plug-in is http://www.tightvnc.com.
To retrieve a plug-in redistributed by Cisco and import it into the security appliance, perform the
following steps:
Step 1 Create a temporary directory named plugins on the computer you use to establish ASDM sessions with
the security appliance.
Step 2 Download the plug-ins you want from the Cisco website to the plugins directory.
Step 3 Choose Configuration > Remote Access VPN > Clientless SSL VPN Access > Portal > Client-Server
Plug-ins.
This pane displays the plug-ins that are available to Clientless SSL sessions.
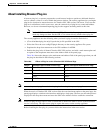
Step 4 Click Import.
The Import Client-Server Plug-in dialog box opens.
Step 5 Use the following descriptions to enter the field values.
Fields
The Import Client-Server Plug-in dialog box displays the following fields:
• Plug-in Name—Select one of the following values:
–
ica to provide plug-in access to Citrix MetaFrame services. Then specify the path to the
ica-plugin.jar file in the Remote Server field, as described below.
–
rdp to provide plug-in access to Remote Desktop Protocol services. Then specify the path to
the rdp-plugin.jar file in the Remote Server field.
–
ssh,telnet to provide plug-in access to both Secure Shell and Telnet services. Then specify the
path to the ssh-plugin.jar file in the Remote Server field.
–
vnc to provide plug-in access to Virtual Network Computing services. Then specify the path to
the vnc-plugin.jar file in the Remote Server field.
Note Any undocumented options in this menu are experimental and are not supported.
• Select a file—Click one of the following options and insert a path into its text field.
–
Local computer—Click to retrieve the plug-in from the computer with which you have
established the ASDM session. Enter the location and name of the plug-in into the associated
Path field, or click Browse Local Files and navigate to the plug-in, choose it, then click Select.
–
Flash file system—Click if the plug-in is present on the file system of the security appliance.
Enter the location and name of the plug-in into the associated Path field, or click Browse Flash
and navigate to the plug-in, choose it, then click OK.
–
Remote Server—Click to retrieve the plug-in from a host running an FTP or TFTP server.
Choose ftp, tftp, or HTTP from the drop-down menu next to the associated Path attribute,
depending on which service is running on the remote server. Enter the host name or address of
the server and the path to the plug-in into the adjacent text field.
Step 6 Click Import Now.
Click Apply.