


38-6
Cisco ASDM User Guide
OL-16647-01
Chapter 38 Clientless SSL VPN
Configuring the Setup for Cisco Secure Desktop
You can use the buttons in this window as follows:
• To select the path of the securedesktop_asa_<n>_<n>*.pkg file to be transferred, click Upload. The
Selected File Path dialog box displays the contents of the folder you last accessed on your local
computer. Navigate to the securedesktop_asa_<n>_<n>*.pkg file, select it, and click Open.
• To select the target directory for the file, click Browse Flash. The Browse Flash dialog box displays
the contents of the flash card.
• To upload the securedesktop_asa_<n>_<n>*.pkg file from your local computer to the flash device,
click Upload File. A Status window appears and remains open for the duration of the file transfer.
Following the transfer, an Information window displays the message, “File is uploaded to flash
successfully.” Click OK. The Upload Image dialog window removes the contents of the Local File
Path and Flash File System Path fields.
• To close the Upload Image dialog window, click Close. Click this button after you upload the Cisco
Secure Desktop image to the flash device or if you decide not to upload it. If you uploaded it, the
filename appears in the Location field of the Cisco Secure Desktop Setup window. If you did not
upload it, a Close Message dialog box prompts, “Are you sure you want to close the dialog without
uploading the file?” Click OK if you do not want to upload the file. The Close Message and Upload
Image dialog boxes close, revealing the Cisco Secure Desktop Setup pane. Otherwise, click Cancel
in the Close Message dialog box. The dialog box closes, revealing the Upload Image dialog box
again, with the values in the fields intact. Click Upload File.
Fields
The Upload Image dialog box displays the following fields:
• Local File Path—Specifies the path to the securedesktop_asa_<n>_<n>*.pkg file on your local
computer. Click Browse Local to automatically insert the path in this field, or enter the path.
For example:
D:\Documents and Settings\Windows_user_name.AMER\My Documents\My
Downloads\securedesktop_asa_3_1_1_16.pkg
ASDM inserts the file path into the Local File Path field.
• Flash File System Path—Specifies the destination path on the flash device of the security appliance
and the name of the destination file. Click Browse Flash to automatically insert the path into this
field, or enter the path. For example,
disk0:/securedesktop_asa_3_1_1_16.pkg
• File Name—Located in the Browse Flash dialog box that opens if you click Browse Flash, this field
displays the name of the Cisco Secure Desktop image you selected on your local computer. We
recommend that you use this name to prevent confusion. Confirm that this field displays the same
name of the local file you selected and click OK. The Browse Flash dialog box closes. ASDM inserts
the destination file path into the Flash File System Path field.
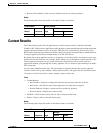
Modes
The following table shows the modes in which this feature is available:
Firewall Mode Security Context
Routed Transparent Single
Multiple
Context System
• — • ——