19-21
Cisco ASDM User Guide
OL-16647-01
Chapter 19 Adding Global Objects
TLS Proxy Wizard
Add TLS Proxy Instance Wizard – Server Configuration
Note This feature is not supported for ASDM version 6.1.5 or the Adaptive Security Appliance version 8.1.2.
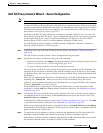
Use the Add TLS Proxy Instance Wizard to add a TLS Proxy to enable inspection of SSL encrypted VoIP
signaling, namely Skinny and SIP, interacting with Cisco Call Manager and to support the Cisco Unified
Communications features on the security appliance. For a detailed overview of the TLS Proxy used by
these features, see TLS Proxy Wizard, page 19-17.
The fields in the Edit TLS Proxy dialog box are identical to the fields displayed when you add a TLS
Proxy instance. Use the Edit TLS Proxy – Server Configuration tab to edit the server proxy parameters
for the original TLS Server—the Cisco Unified Call Manager (CUCM) server, the Cisco Unified
Presence Server (CUPS), or the Cisco Unified Mobility Advantage (CUMA) server.
The Add TLS Proxy Instance Wizard is available from the Configuration > Firewall > Advanced >
Encrypted Traffic Inspection > TLS Proxy pane.
Step 1 Complete the first step of the Add TLS Proxy Instance Wizard. See Adding a TLS Proxy Instance,
page 19-20.
The Add TLS Proxy Instance Wizard – Server Configuration dialog box opens.
Step 2 Specify the server proxy certificate by doing one of the following:
• To add a new certificate, click Manage. The Manage Identify Certificates dialog box opens. See Add
TLS Proxy Instance Wizard – Client Configuration, page 19-22.
• To select an existing certificate, select one from the drop-down list.
The server proxy certificate is used to specify the trustpoint to present during the TLS handshake. The
trustpoint can be self-signed or enrolled locally with the certificate service on the proxy. For example,
for the Phone Proxy, the server proxy certificate is used by the Phone Proxy during the handshake with
the IP phones.
When you are configuring the TLS Proxy for the Phone Proxy, select the certificate that has a filename
beginning with _internal_PP_. When you create the CTL file for the Phone Proxy, the security
appliance, creates an internal trustpoint used by the Phone Proxy to sign the TFTP files. The trustpoint
is named _internal_PP_ctl-instance_filename.
When the Phone Proxy is operating in a mixed-mode CUCM cluster, you must import the CUCM
certificate by clicking Add in the Manage Identify Certificates dialog box. See Add/Install an Identity
Certificate, page 33-12.
Step 3 To install the TLS server certificate in the security appliance trust store, so that the security appliance
can authenticate the TLS server during TLS handshake between the proxy and the TLS server, click
Install TLS Server’s Certificate.
The Manage CA Certificates dialog box opens. See CA Certificate Authentication, page 33-1. Click Add
to open the Install Certificate dialog box. See Add/Install a CA Certificate, page 33-3.
When you are configuring the TLS Proxy for the Phone Proxy, click Install TLS Server’s Certificate
and install the Cisco Unified Call Manager (CUCM) certificate so that the proxy can authenticate the IP
phones on behalf of the CUCM server.
Step 4 To require the security appliance to present a certificate and authenticate the TLS client during TLS
handshake, check the Enable client authentication during TLS Proxy handshake check box.
When adding a TLS Proxy Instance for Mobile Advantage (the CUMC client and CUMA server), disable
the check box when the client is incapable of sending a client certificate.


