


16-18
Cisco ASDM User Guide
OL-16647-01
Chapter 16 Configuring Management Access
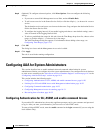
Configuring SNMP
• Adding an SNMP Management Station, page 16-18
Configuring the SNMP Agent
To configure an SNMP agent, perform the following steps:
Step 1 From the Configuration > Device Management > Management Access > SNMP pane, in the Community
String (default) field, add a default community string.
Enter the password used by the SNMP management stations when sending requests to the security
appliance. The SNMP community string is a shared secret among the SNMP management stations and
the network nodes being managed. The security appliance uses the password to determine if the
incoming SNMP request is valid. The password is a case-sensitive value up to 32 characters in length.
Spaces are not permitted. The default is "public." SNMPv2c allows separate community strings to be set
for each management station. If no community string is configured for any management station, the
value set here will be used by default.
Step 2 In the Contact field, add the name of the security appliance system administrator. The text is
case-sensitive and can be up to 127 characters. Spaces are accepted, but multiple spaces are shortened
to a single space.
Step 3 In the Location field, add the location of the security appliance being managed by SNMP. The text is
case-sensitive and can be up to 127 characters. Spaces are accepted, but multiple spaces are shortened
to a single space.
Step 4 In the Listening Port field, add the number of the security appliance port that listens for SNMP requests
from management stations; or keep the default, port number161.
Step 5 Click Apply.
The SNMP agent is configured and the changes are saved to the running configuration.
Adding an SNMP Management Station
To add an SNMP management station, perform the following steps:
Step 1 From the Configuration > Device Management > Management Access > SNMP pane, Click Add.
The Add SNMP Host Access Entry dialog box appears.
Step 2 From the Interface Name drop-down menu, choose the interface where the SNMP host resides.
Step 3 In the IP Address field, add the SNMP host IP address.
Step 4 In the UDP Port field, add the SNMP host UDP port, or keep the default, port 162.
Step 5 In the Community String field, add the SNMP host community string. If no community string is specified
for a management station, the value set in Community String (default) field on the SNMP pane will be
used.
Step 6 From the SNMP Version drop-down menu, choose the SNMP version used by the SNMP host.
Step 7 Check the Poll or Trap check boxes to specify the method for communicating with this management
station.
Step 8 Click OK.
The dialog box closes.