


606 CHAPTER 27: MANAGING SYSTEM FILES
The above command copies the file to the same filename. To rename the
file when copying it, type the following command:
WX1200# copy tftp://10.1.1.1/newconfig wxconfig
success: received 637 bytes in 0.253 seconds [ 2517
bytes/sec]
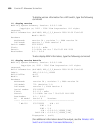
To copy system image wxb04102.rel from a TFTP server to boot partition
1 in nonvolatile storage, type the following command:
WX1200# copy tftp://10.1.1.107/wxb04102.rel boot1:wxb04102.rel
................................................................................
............................success: received 9163214 bytes in 105.939 seconds
[ 86495 bytes/sec]
To rename test-config to new-config, you can copy it from one name to
the other in the same location, and then delete test-config. Type the
following commands:
WX1200# copy test-config new-config
WX1200# delete test-config
success: file deleted.
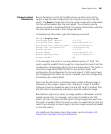
To copy file corpa-login.html from a TFTP server into subdirectory corpa in
a WX switch’s nonvolatile storage, type the following command:
WX1200# copy tftp://10.1.1.1/corpa-login.html corpa/corpa-login.html
success: received 637 bytes in 0.253 seconds [ 2517 bytes/sec]
Using an Image File’s
MD5 Checksum To
Verify Its Integrity
If you download an image file from the 3Com support site and install it in
a switch’s boot partition, you can verify that the file has not been
corrupted while being copied.
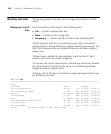
md5 [boot0: | boot1:]filename
To verify an image file’s integrity:
1 Download the image file from the 3Com support site onto a TFTP server,
and use the CLI copy tftp command on the WX switch to copy the
image onto the switch’s nonvolatile storage.
2 On the 3Com support site, click on the MD5 link next to the link for the
image file, to display the MD5 checksum for the file. Here is an example:
b9cf7f527f74608e50c70e8fb896392a wxb04102.rel
3 On the WX switch, use the dir command to display the contents of
nonvolatile storage.