Forwarding Settings
11-39
11
System Manager Settings
NOTE
•
To cancel a selected destination, select the destination again.
•
To view the detailed information of a selected destination, select the destination
➞
press [Details].
•
To be able to select a destination for the forwarding done notice, it is necessary to
register destinations in the Address Book beforehand. (See "Storing New
Addresses," on p. 10-5.)
•
[Access Number] is displayed on the screen only if Access Number Management in
Restrict the Send Function in System Settings (from the Additional Functions
screen) is set to 'On'. (See "Access Number Management," on p. 11-16.)
9
Select whether to check [Notice Only for Errors].
If you want the forwarding done notice to be sent only when an error occurs,
press [Notice Only for Errors].
If you want the forwarding done notice to be sent every time a received
document is forwarded, do not press [Notice Only for Errors].
10
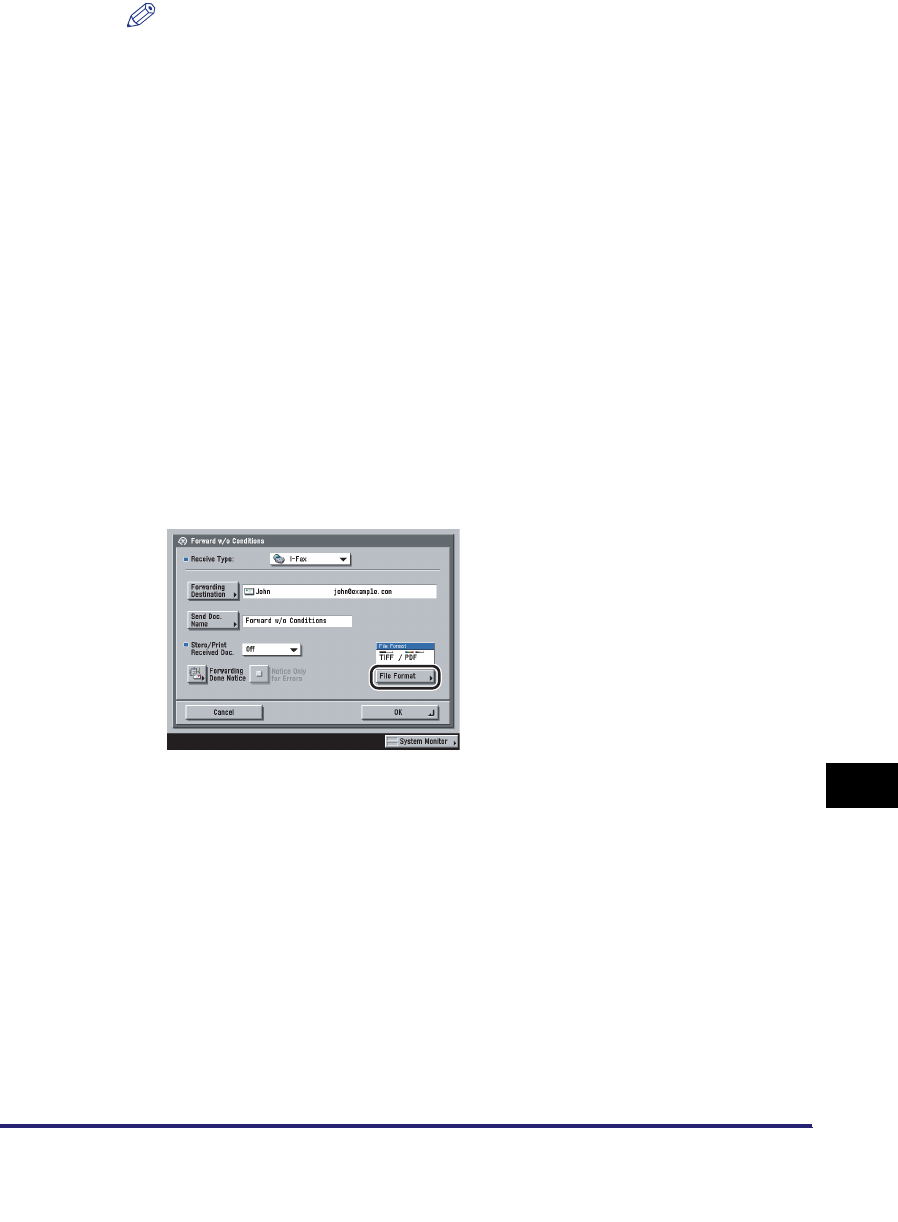
Press [File Format] ➞ select the file format of the document
you want to forward.
This part of the procedure is not necessary if any one of the following is true:
• An I-fax address is specified as the forwarding destination
• A fax number is specified as the forwarding destination
• A Confidential Fax Inbox is specified as the forwarding destination
If [Fax] is selected as the receive type, you can select from the following file
formats:
If [I-Fax] is selected as the receive type, you can select from the following file
formats:
[TIFF]: Sends the file in the TIFF format.
[PDF]: Sends the file in the PDF format. You can also specify [OCR (Text
Searchable)] and/or [Add Digital Signatures].


