


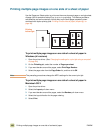

104 Adding a blank page (job separator page) or back cover to the end of a print job (computer only)
Adding a blank page (job separator page) or back cover to the
end of a print job (computer only)
Use this option to add a blank page to the end of a print job.
To print a blank page in Windows 95, Windows 98, Windows Me, and
Windows NT 4.0 (PCL only)
Note This option is not available for the PS driver.
1 Open the printer driver (see “Changing the settings for a print job using a computer” on
page 94).
2 On the Paper tab, select Use different paper for first page. The First Page, Other
Pages, and Back Cover tabs appear.
3 Select the Size, Source is, and Type is for the back cover, and then touch O
K.
To print a blank page in Windows 2000 and Windows XP
1 Open the printer driver (see “Changing the settings for a print job using a computer” on
page 94).
2 On the Paper/Quality tab, select Use Different Paper. First Page, Other Pages, and
Back Cover become available.
3 Select Back Cover.
4 Select Add a blank back cover.
5 Select the Source is and Type is for the back cover, and then click OK.
Note The preceding procedures change the MFP’s settings for a print job. To change the MFP’s
default settings, see “Changing default settings” on page 94.
Adding a blank page to the beginning of all print jobs (job
separator page)
Use this option to add a blank page to the beginning of all print jobs. This separates print
jobs, making each print job easier to find.
To add a blank page to the beginning of all print jobs in Windows 95,
Windows 98, Windows Me, and Windows NT 4.0
1 Click the Start button, point to Settings, and then click Printers.
2 Right-click the HP color LaserJet 9500mfp icon, and then click Properties.
3 On the General tab, click Separator Page.
4 Browse to find a separator page. Any printable document can be used as a separator
page.
5 Click OK to select a separator page.
6 Click OK to return to the General tab.