


ENWW 4 Faxing 61
Changing the notification setting
Use the notification setting to specify when and how you are notified of the status of an
outgoing fax. This setting applies to the current fax only. To change the setting
permanently, change the default setting. See “Scheduling fax-call report printing” on
page 78.
1 On the control panel main screen, touch the F
AX option.
2 Touch S
ETTINGS.
3 Touch F
AX SETTINGS.
4 Perform one of the following actions on the Notify tab:
• Touch N
ONE to turn off notification, and then touch OK.
• Touch T
HIS JOB or ON ERROR to turn on notification and continue to the next step.
5 Touch P
RINT to receive a printed notification, or touch E-MAIL to make the control-
panel keyboard available.
Note The e-mail notification works if you have configured e-mail. If “Not Configured” appears on
the e-mail option, e-mail is not configured. To configure e-mail, use the MFP e-mail menu
settings.
6 If you selected e-mail, use the control-panel keyboard to type an e-mail address, and
then touch O
K.
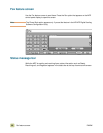
Speed dial
Use speed dial to assign a speed dial name to a single number or a group of numbers.
You can send a fax to that number or numbers by selecting the speed dial name.
To create a speed dial
1 Touch the FAX option.
2 Touch S
PEED DIAL.
3 Touch the Edit tab.
4 Touch N
EW SPEED DIAL.
5 Type a number by using the control-panel keyboard. If you want to specify more than
one number, touch N
EXT NUMBER and then specify another number. Repeat this step
to define all of the numbers for the speed dial.
6 Touch N
AME.
7 Type a name for the speed dial using the control-panel keyboard.
8 Touch O
K.
Note After you have created a speed dial group, you cannot add or delete individual numbers
from it.