


ENWW 4 Faxing 53
Verifying the fax operation
Verify that the MFP fax is functioning by checking the MFP control-panel display. The fax
option should appear on the screen. However, until the required settings are established,
the option is gray and the text “Not Configured” appears across it. To use the analog fax,
see Establishing the required fax settings.
Establishing the required fax settings
After the fax is installed, you must establish these settings before you can use the fax:
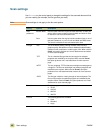
● Date and time
● Location (country/region)
● Fax header (phone number and company name)
This information is used in the fax header that is printed on all outgoing faxes.
Note In the U.S. and many other countries/regions, setting the date, time, location, phone number
and company name is a legal requirement.
Because the fax reads some of these settings from the MFP, a value might already be set.
Verify the value that appears to make sure that the information is correct.
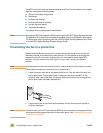
Using the Fax Settings menu
Use the Fax Settings menu to establish the required fax settings. Press the MENU button
on the MFP control panel to open the Fax Settings menu.
Note If you have the HP MFP Digital Sending Software installed and the LAN fax is enabled, the
fax settings do not appear on the menu because the settings are only used to configure
the analog fax. Only one type of fax can be enabled at a time, and only the controls for that
fax appear on the control-panel display. If you want to use analog fax when the LAN fax is
enabled, use the HP MFP Digital Sending Software Configuration Utility to disable the LAN
fax. See “To set the analog MFP fax settings from the HP MFP Digital Sending Software
Configuration Utility” on page 65.