


124 ENWW
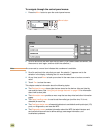
To navigate through the control-panel menus
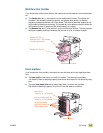
1 Press the MENU button to open the control-panel menus.
2 Scroll to and touch the menu item that you want. (If you need to select a submenu, use
the arrows to scroll again, and then touch the submenu.)
Note An arrow next to a menu item indicates that a submenu is available.
3 Scroll to and touch the value that you want. An asterisk (*) appears next to the
selection in the display, indicating that it is now the default.
4 At any time, touch B
ACK to back up one level in the menu tree or to clear a numeric
value.
5 Touch E
XIT to close the menu.
This chapter contains information about the following topics:
● The Retrieve job menu shows jobs that are stored on the device. Jobs are listed by
user and job name. See “Using the job-storage features” on page 108 for information
about how to store jobs.
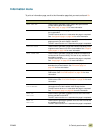
● The Information menu provides a menu map that can be printed and other information
pages.
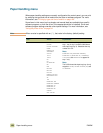
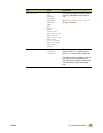
● The Paper handling menu is used to set the media type (and the size, if it is not
detected) for each tray.
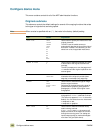
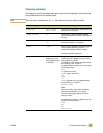
● The Configure device menu allows administrators to set defaults and input/output (I/O)
ports, run diagnostics, and reset the MFP.
● The Diagnostics menu provides information about the MFP that administrators and
service technicians can use to define settings, see usage information, and
troubleshoot problems.
MENU button