


54 Establishing the required fax settings ENWW
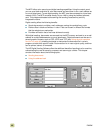
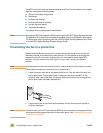
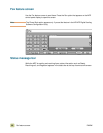
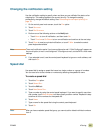
The following figure shows the control-panel with the fax option visible.
Figure 3: Fax option
Setting or verifying the date and time
The date and time setting for the fax is the same value as the MFP date and time setting. If
you are turning on the MFP for the first time, you will be prompted for this information.
To verify or change the date and time settings
1 Press the MENU button.
2 Scroll to and touch F
AX.
3 Scroll to and touch F
AX SETUP REQUIRED.
4 Scroll to and touch D
ATE/TIME.
5 Select the date and time formats, and then type the date and time.
Setting or verifying the location
The location setting identifies the country/region where the MFP is located. This setting
selects the date/time format and the minimum and maximum rings-to-answer range for the
country/region. Because this setting is a legal requirement in some countries/regions, it
must be set before the fax can operate. If you are turning on the MFP for the first time, you
will be prompted for this information.
To verify or change the location
1 Press the MENU button.
2 Scroll to and touch F
AX.
3 Scroll to and touch F
AX SETUP REQUIRED.
4 Scroll to and touch F
AX HEADER.
5 Scroll to and touch L
OCATION.
6 Scroll through the list until your country/region appears, and then touch the country/
region to select it.
Touch-screen
graphical display
MENU button
START button
Fax option