ENWW 1 MFP basics 27
Note
If the size displayed on the control panel is CUSTOM, then the tray
size is set to ANY CUSTOM. The tray will match any custom-size
print job, even if the print-job dimensions are different from the
dimensions of the paper that is loaded in the tray. If you prefer,
you can specify the exact dimensions of the custom-size paper
that is loaded in the tray. When you specify exact dimensions, the
dimensions are displayed as the size, rather than CUSTOM.
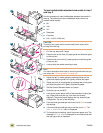
11 Touch C
USTOM. The Unit of Measure menu is displayed.
Note
The MFP might prompt you to move the Custom/Standard switch
in the tray to another position. The MFP might also prompt you to
move the paper guides. Follow the instructions on the control
panel, close the tray, and then repeat this procedure starting with
step 10.
12 Touch the unit of measure (M
ILLIMETERS or INCHES). (If you
are using the measurement on the tray guide, select
M
ILLIMETERS.)
13 Use the numeric keypad to select the X (front to back)
dimension.
14 Touch O
K.
15 Use the numeric keypad to select the Y (left to right)
dimension.
16 Touch O
K. The control panel displays SETTING SAVED for a
moment. The tray size in dimensions is then displayed.
17 To change the type setting, touch the correct paper type. The
message SETTING SAVED is displayed for a moment, and then
the size and type settings are displayed.
Note
If you are using media that is lighter or heavier than 75 g/m² to
105 g/m² (20 to 28 lb), or if you are using coated media or
transparencies, set the media type for the tray.
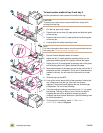
18 Touch E
XIT to accept the settings. The tray is ready to use.
Note
See “Selecting media for your document” on page 175 for more
information about selecting types of media.


