


ENWW 9 Managing and maintaining 233
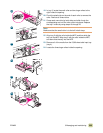
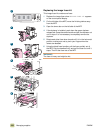
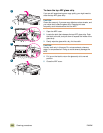
7 Remove the new fuser from its packaging.
8 Align the fuser with the black guide-rails inside the MFP.
Pushing against both ends of the fuser, slide it completely into
the MFP. Rotate the blue levers outward until they click into
place.
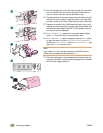
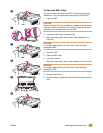
9 Slide the duplexer into the MFP until it clicks into place. Close
the left door. Reattach any previously removed finishing
device.
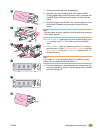
Note
If the door does not close, make sure that the blue fuser levers are
in the vertical position.
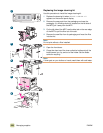
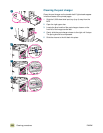
10 If NEW FUSER KIT appears on the control-panel display, touch
Y
ES and then touch OK. The kit life-count is automatically
reset.
11 If NEW FUSER KIT does not appear, press the M
ENU button to
open the menus. Touch C
ONFIGURE DEVICE, RESETS, and then
R
ESET SUPPLIES. Scroll to NEW FUSER KIT, and then touch YES
to reset the count.
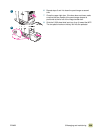
Note
If you select N
O or do not make a selection, the MFP remains
offline until you replace the kit and select YES.
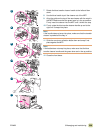
12 Place the used fuser in the packaging from the new fuser. For
recycling information, see the recycling guide that is included
with the new fuser kit.
7
8
9
10
11
12