74 Secure settings ENWW
Secure settings
The fax forwarding and fax printing are secure features that require a personal
identification number (PIN). You are required to create a PIN the first time you use either
setting. After you create that PIN, you can use it to gain access to both features. That is, if
you have created a PIN for fax forwarding, you use the same PIN to gain access to fax
printing, and vice versa. An individual can create only one PIN for access to both of these
secure settings.
Changing your PIN
Use this procedure to change your existing PIN.
To change your PIN
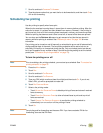
1 Press the MENU button.
2 Touch F
AX.
3 Scroll to and touch F
AX RECEIVE.
4 Scroll to and touch F
ORWARD FAX or FAX PRINTING.
5 Scroll to and touch C
HANGE PIN.
6 Use the keypad on the control panel to type your existing PIN, and then touch O
K.
7 Use the keypad on the control panel to type a new PIN (at least four digits), and then
touch O
K.
8 Verify the PIN by typing it again, and then touch O
K.
Setting fax forwarding
Use the forward fax setting to forward all of the faxes that the MFP receives to another
phone number. When fax forward is enabled, the receiving MFP prints the fax (if fax
printing is enabled, the fax is printed when the lock is disabled) and also forwards the fax
to the specified number.
Note Fax forwarding is attempted only once. No retry option exists.
To set fax forwarding
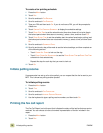
1 Press the MENU button.
2 Touch F
AX.
3 Scroll to and touch F
AX RECEIVE.
4 Scroll to and touch F
ORWARD FAX.
5 Use the keypad on the control panel to type your PIN (which must contain at least four
digits), and then touch O
K. If you have an existing PIN, the FORWARD TO NUMBER
screen appears. If you have not previously created a PIN, you are prompted to verify
the new PIN. Retype the PIN, and then touch O
K.
6 Scroll to and touch F
AX FORWARDING.


