


ENWW 10 Problem solving 323
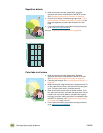
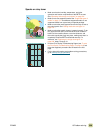
Broken horizontal lines
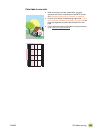
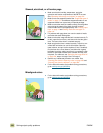
Vertical lines
● Clean the fuser input. See “Cleaning the fuser input” on
page 240.
● For the latest information and problem-solving procedures,
go to www.hp.com/go/clj9500mfp.
● Make sure that the image drums are seated correctly. To do
this, open the front doors, lower the green lever, and lower
the image-drum door. Pull each drum out a short distance,
and then slide the drum gently but firmly into place, making
sure that it is completely inside the
MFP. For reference, see
“Replacing the image drums” on page 218, steps 2 through
4 and step 9 (installed image drums do not have a gray
cover).
● Make sure that the image transfer belt is seated correctly. To
do this, open the front doors, and lower and raise the green
lever. The lever clicks when it is latched securely.
● Make sure that the transfer cleaner is seated correctly. To do
this, open the front doors, and remove the toner collection
bottle. Pull the transfer cleaner out a short distance, and
then slide it gently but firmly into place, making sure that it is
completely inside the
MFP and latched securely. For
reference, see “Replacing the image cleaning kit” on
page 228, steps 7 through 13.
● Make sure that the transfer roller is seated correctly. To do
this, open the front doors, and lower the green lever. Pull the
transfer roller out a short distance, and then slide it gently
but firmly into place, making sure that it is completely inside
the
MFP. For reference, see “Replacing the image transfer
kit” on page 222, steps 3 and 10.
● Print the Print Quality Troubleshooting Pages (see “To print
the Print Quality Troubleshooting Pages” on page 319) and
follow the diagnostic procedure that is listed on the first
page.
● For the latest information and problem-solving procedures,
go to www.hp.com/go/clj9500mfp
.