


190 | MAC-basedAuthentication DellPowerConnectW-SeriesArubaOS6.2 | User Guide
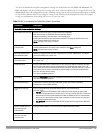
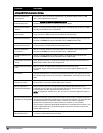
Parameter Description
Case The case (upper or lower) used in the MAC string.
Default: lower
Max Authentication failures Number of times a station can fail to authenticate before it is blacklisted. A value of 0
disables blacklisting.
Default: 0
Using the WebUI to configure a MAC authentication profile
1. Navigate to the Configuration > Security > Authentication > L2 Authentication page.
2. Select MAC Authentication Profile.
3. Enter a profile name and click Add.
4. Select the profile name to display configurable parameters.
5. Configure the parameters, as described in Table 58.
6. Click Apply.
Using the CLI to configure a MAC authentication profile
(host)(configure) #aaa authentication mac <profile>
case {lower|upper}
delimiter {colon|dash|none}
max-authentication-failures <number>
Configuring Clients
You can create entries in the controller’s internal database that can be used to authenticate client MAC addresses.
The internal database contains a list of clients along with the password and default role for each client. To configure
entries in the internal database for MAC authentication, you enter the MAC address for both the user name and
password for each client.
NOTE: You must enter the MAC address using the delimiter format configured in the MAC authentication profile. The default
delimiter is none, which means that MAC addresses should be in the format xxxxxxxxxxxx. If you specify colons for the delimiter, you
can enter MAC addresses in the format xx:xx:xx:xx:xx:xx.
In the WebUI
1. Navigate to the Configuration > Security > Authentication > Servers page.
2. Select Internal DB.
3. Click Add User in the Users section. The user configuration page displays.
4. For User Name and Password, enter the MAC address for the client. Use the format specified by the Delimiter
parameter in the MAC Authentication profile. For example, if the MAC Authentication profile specifies the
default delimiter (none), enter MAC addresses in the format xxxxxxxxxxxx.
5. Click Enabled to activate this entry on creation.
6. Click Apply to apply the configuration.
NOTE: The configuration does not take effect until you perform this step.