


Model the Air Monitors
You now determine how many AMs are required to provide a specified monitoring rate. In this example you
continue to use the Coverage Model and make the following assumptions:
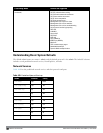
l 802.11 b|g monitor rate: 24 Mbps
l 802.11 a monitor rate: 24 Mbps
1. Select 24 from the 802.11 b|g Monitor Rate drop-down menu.
2. Select 24 from the 802.11 a Monitor Rate drop-down menu.
3. Click Save, then OK.
4. Click Apply. RF Plan moves to the Planning page.
Add and Edit a Floor
You now add floor plans to your floors. In this section you:
l Add a background image floor plan for each floor
l Name the floors
NOTE: The information in this section assumes that you have a JPEG file that you can use as a sample background image when
re-creating the steps.
Adding the background image and naming the first floor
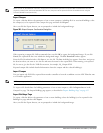
1. In the Planning page, click the Edit Floor link at the right of the Floor 1 indicator. The Floor Editor dialog box
appears.
2. Enter: Entrance Levelin the Name box of the Floor Editor Dialog.
3. Use the Browse button to locate the background image for the 1st floor.
4. Click Apply.
Adding the background image and naming the second floor
1. Click the Edit Floor link at the right of the Floor 2 indicator.
2. Enter: Second Levelin the Name box of the Floor Editor Dialog.
3. Use the Browse button to locate the background image for the 2nd floor.
4. Click Apply.
5. Click Save on the Planning page, then OK.
Defining Areas
Before you advance to the AP and AM Planning pages, define special areas, such as Don’t Care, Don’t Deploy, or
802.11n Zone. This example includes a Don’t Care and a Don’t Deploy Area.
This example assumes the following:
l We do not care if we have coverage in the Shipping and Receiving Area
l We do not want to deploy APs or AMs in the Lobby Area
Creating a Don’t Care Area
NOTE: You can zoom in on the floor plan using the Zoom drop-down near the top of the AP Planning page, or type a zoom
DellPowerConnectW-SeriesArubaOS6.2 | User Guide RF Plan | 821