


650 | ManagementAccess DellPowerConnectW-SeriesArubaOS6.2 | User Guide
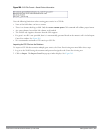
1. Navigate to the Configuration > Security > Access Control > Guest Access page.
2. Click Browse to insert a logo or other banner information on the window.
NOTE: Best practices is to use a logo or banner image that is 600 x 100 pixels (width x height). The WebUI does not apply the size
restrictions when you upload an image file, but the image is resized to 600 x 100 pixels when it displays or is printed.
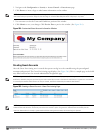
3. You can enter text for the Terms and Conditions portion of the window.
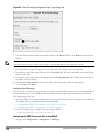
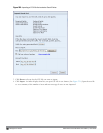
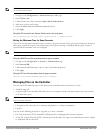
4. Click Submit to save your changes. Click Preview Pass to preview the window. (See Figure 264.)
Figure 264: Customized Guest Account Information Window
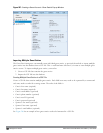
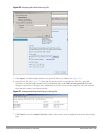
Creating Guest Accounts
After the Guest Provisioning user is created, that person can log in to the controller using the preconfigured
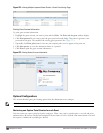
username and password. The Guest Provisioning page displays. (See Figure 266.) This is a sample page as the fields
may differ based on how the network administrator designed the page.
NOTE: Starting with ArubaOS 3.4 release, a guest user account that is created by a guest provisioning user can only be viewed,
modified or deleted by the guest provisioning user who created the account or the network administrator. A guest user account that
is created by the network administrator can only be viewed, modified or deleted by the network administrator.
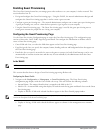
Figure 265: Creating a Guest Account—Guest Provisioning Page
NOTE: If you do not want multiple guest users to share the same guest account concurrently, navigate to the Captive Portal
Authentication and select the “Allow only one active user session” option. If a guest user authenticates successfully but the
controller detects there is already a guest session with the same guest username, the second login is rejected.