


1. From the Internet Authentication Service window, right click the Remote Access Policies folder and select New
Remote Access Policy.
2. The New Remote Access Policy Wizard opens. Click Next on the first window to start the wizard.
3. Select Use the wizard to set up a typical Policy for a common scenario and enter a name for the policy, e.g
Remote-Policy. Click Next.
4. In the Access Method window of the wizard, select the method you will use to gain management access to the
network. Click Next.
5. In the User or Group Access window of the wizard, select either user or group, depending upon how your user
permissions are defined. Click Next.
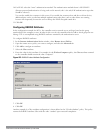
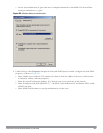
6. In the Authentication Method window, click the Type drop-down list and select Protected EAP (PEAP). Click
Next.
7. Click Finish.
Defining Properties for Remote Policy
Now you must define properties for the remote policy you just created.
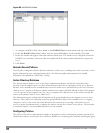
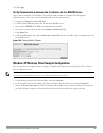
1. In the Internet Authentication Service window, click the Remote Access Policy icon. All configured remote
access policies will appear in the right window pane.
2. Right-click the policy you just created, and select Properties. The Properties window opens.
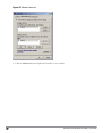
3. Select the Grant remote access permission radio button, and click Edit Profile. The Edit Profile window opens.
4. Click the Authentication tab and select the authentication methods that include MS-CHAP, MS-CHAP V2 and
PAP.
5. Click Apply.
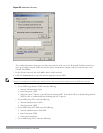
6. Click the Advanced tab.
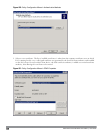
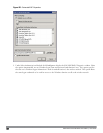
7. Click Add. The Add Attribute window opens.
8. Scroll down the list of attributes and select Vendor-Specific, then click Add. The MultiValued Attribute
Information window appears.
9. Click Add again.
10. Enter the vendor code 14823 and select the option Yes, It conforms.
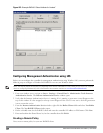
11. Click Configure Attribute. The Configure VSA window opens.
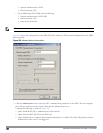
12. In the Vendor-assigned attribute number field, enter 3.
13. In the Attribute value field, enter 7.
14. Click OK to save your settings.
15. Click Apply.
16. Click Apply.
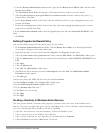
Creating a User Entry in Windows Active Directory
Now that you have defined your remote policy properties, you must create a user entry in the Windows active
directory. The steps to complete this process will vary, depending on the version of Windows currently running on
your server. The procedure below should be used only as a guideline.
1. Open the “Active Directory Users and Computers” tool on your Windows server.
2. Create a new user entry on the Windows Active directory.
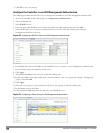
3. Once you have created the new user, right-click the user name and select Properties.
4. Click the Dial-in tab and select “Allow access” for the user.
DellPowerConnectW-SeriesArubaOS6.2 | User Guide | 848