


558 | VirtualIntranet Access DellPowerConnectW-SeriesArubaOS6.2 | User Guide
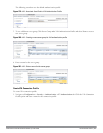
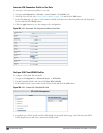
Figure 182: VIA - Create VIA Connection Profile
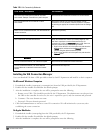
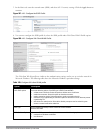
2. Click on the new VIA connection profile to configure the connection settings. VIA Connection profile settings
are divided into two tabs, Basic and Advanced. The Basic tab displays only those configuration settings that
often need to be adjusted to suit a specific network. The Advanced tab shows all configuration settings,
including settings that do not need frequent adjustment or should be kept at their default values. If you change a
setting on one tab then click and display the other tab without saving your configuration, that setting will revert
to its previous value.
3. Click Apply to save your changes.
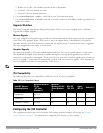
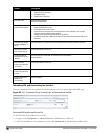
Configuration Option Description
Basic VIA Connection Profile Settings
VIA Servers Enter the following information about the VIA controller.
l
Controller Hostname/IP Address
: This is the public IP address or the DNS hostname of
the VIA controller. Users will connect to remote server using this IP address or the
hostname.
l Controller Internal IP Address: This is the IP address of any of the VLAN interface IP
addresses belongs to this controller.
l Controller Description: This is a human-readable description of the controller.
Click the Add button after you have entered all the details. If you have more than one VIA
controller you order them by clicking the
Up
and
Down
arrows.
To delete a controller from your list, select a controller and click the Delete button.
Client Auto-Login Enable or disable VIA client to auto login and establish a secure connection to the
controller.
Default: Enabled
VIA tunneled networks A list of network destination (IP address and netmask) that the VIA client will tunnel through
the controller. All other network destinations will be reachable directly by the VIA client.
l Enter an IP address & network mask and click the Add button to add to the tunneled
networks list.
l To delete a network entry, select the IP address and click the Delete button.
Enable split-tunneling Enable or disable split tunneling.
l If enabled, all traffic to the VIA tunneled networks (Step 3 in this table) will go through
the controller and the rest is just bridged directly on the client.
l If disabled, all traffic will flow through the controller.
Default: off
Allow client-side logging Enable or disable client side logging. If enabled, VIA client will collect logs that can be sent
Table 183:
VIA - Connection Profile Options