


262 | CaptivePortalAuthentication DellPowerConnectW-SeriesArubaOS6.2 | User Guide
To make any adjustments to your page, edit your file locally and simply re-upload to the controller in order to
view the page again.
6. Finally, it is possible to customize the welcome page on the controller, however for language localization it is
recommended to use an "external welcome page" instead. This can be a web site on an external server, or it can be
a static page that is uploaded to a controller.
You set the welcome page in the captive portal authentication profile. This is the page that the user will be
redirected to after successful authentication.
If this is required to be a page on the controller, the user needs to create their own web page (using the charset
meta attribute in step 4 above). Upload this page to the designated controller in the same manner as uploading
the captive portal login page under "Configuration > Management >Captive Portal > Upload Custom Login
Pages. For Page Type, select “Captive Portal Welcome Page”.
Any required client side script (CSS) and media files can also be uploaded using the “Content” Page Type,
however file space is limited (use the CLI command show storage to see available space). Remember to leave
ample room for system files.
NOTE: The "Registered User" and "Guest User" sections of the login page are implemented as graphics files, referenced by the
default CSS styles. In order to change these, you will need to create new graphic files, download the CSS file, edit the reference to
the graphics files, change the style reference in your index file and then upload all files as "content" to the controller.
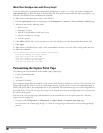
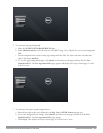
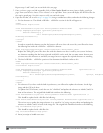
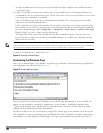
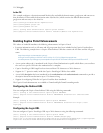
A sample of a translated page is displayed in Figure 71.
Figure 71: Sample Translated Page
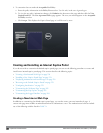
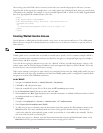
Customizing the Welcome Page
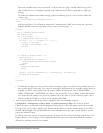
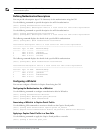
Once a user is authenticated by the controller, a Welcome page is launched. The default welcome page depends on
your configuration, but will look similar to Figure 72:
Figure 72: Default Welcome Page
You can customize this welcome page by building your own HTML page and uploading it to the controller. You
upload it to the controller by navigating to Management > Captive Portal > Upload Login Pagesand select
“Captive Portal Welcome Page” from the Page Type drop-down menu. This file is stored in a directory called
"/upload/" on the controller using the file's original name.
In order to actually use this file, you will need to configure the welcome page on the controller. To do this use the
CLI command: "aaa captive-portal welcome-page /upload/welc.html" where "welc.html" is the name of the file that
you uploaded, or you can change the Welcome page in the captive portal authentication profile in the WebUI.