


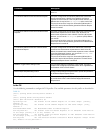

(host)(config) #user-role THR-ROLE-NAME-WPA2
session-acl THR-POLICY-NAME-WPA2
!
(host)(config) #aaa authentication dot1x "THR-DOT1X-AUTH-PROFILE-WPA2"
termination enable
!
(host)(config) #aaa server-group "THR-DOT1X-SERVER-GROUP-WPA2"
auth-server Internal
!
(host)(config) #aaa profile "THR-AAA-PROFILE-WPA2"
authentication-dot1x "THR-DOT1X-AUTH-PROFILE-WPA2"
dot1x-default-role "THR-ROLE-NAME-WPA2"
dot1x-server-group "THR-DOT1X-SERVER-GROUP-WPA2"
!
(host)(config) #wlan ssid-profile "THR-SSID-PROFILE-WPA2"
essid "THR-WPA2"
opmode wpa2-aes
!
(host)(config) #wlan virtual-ap "THR-VIRTUAL-AP-PROFILE-WPA2"
ssid-profile "THR-SSID-PROFILE-WPA2"
aaa-profile "THR-AAA-PROFILE-WPA2"
vlan 60
!
(host)(config) #ap system-profile "THR-AP-SYSTEM-PROFILE"
lms-ip 1.1.1.1
bkup-lms-ip 2.2.2.2
!
(host)(config) #ap-group "THRHQ1-STANDARD"
virtual-ap "THR-VIRTUAL-AP-PROFILE-WPA2"
(host)(config) #ap-system-profile "THR-AP-SYSTEM-PROFILE"
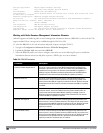
Enabling 802.11k Support
The 802.11k protocol provides mechanisms for APs and clients to dynamically measure the available radio resources.
In an 802.11k enabled network, APs and clients can send neighbor reports, beacon reports, and link measurement
reports to each other. This allows the APs and clients to take appropriate connection actions. The following
procedure outlines the steps to configure 802.11k parameters.
NOTE: The handover process is available for voice clients that support the 802.11k standard and have the ability to transmit and
receive beacon reports. For information on configuring the handoff trigger feature, see "Enabling Wi-Fi Edge Detection and
Handover for Voice Clients" on page 709
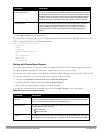
In the WebUI
1. Navigate to the Configuration > Wireless > AP Configuration window. Select either the AP Group or AP
Specific tab.
l If you selected the AP Group tab, click the Edit button by the AP group name for which you want to
configure the new 802.11K profile.
l If you selected the AP Specific tab, click the Edit button by the AP for which you want to create the
802.11K profile.
2. In the Profiles list, expand the Wireless LANmenu, then expand the Virtual AP menu.
3. Select the Virtual AP profile for which you want to configure 802.11k settings.
To edit an existing 802.11k profile, click the 802.11K Profile drop-down list In the Profile Details window pane
and select the 802.1x profile you want to edit.
or
DellPowerConnectW-SeriesArubaOS6.2 | User Guide VirtualAPs | 333