


Background Images
You can import a background image (floor plan image) into RF Plan for each floor. A background image is extremely
helpful when specifying areas where coverage is not desired or areas where an AP/AM is not to be physically deployed.
Use the guidelines in this section when importing background images. By becoming familiar with these guidelines,
you can ensure that your graphic file is edited properly for pre- and post-deployment planning.
l Edit the image—Use an appropriate graphics editor to edit the file as needed.
l Scale the image—If the image is not scaled, proportional triangulation and heat map displays can be incorrect
when the plan is deployed.
l Calculate image dimensions—Calculate the image pixels per feet (or meters) against a known dimension. Use
that value to calculate the width and length of the image.
l Leave a border around the image—When creating the image, leave a boarder around the image to help triangulate
Wi-Fi devices outside of the building.
l Multiple floors—If your building has multiple floors, make sure there is a common anchor point for all floors; for
example an elevator shaft, a staircase, and so on.
l Larger dimensions—Use larger dimensions only for scaling to more accurately calculate the full dimensions. For
best results, final floor images 2048 X 2048 and smaller perform best.
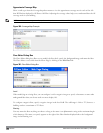
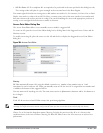
Select a background image using the Browse button on the Floor Editor dialog box.
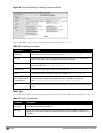
l File Type and Size
Background images must be JPEG format and may not exceed 2048 X 2048 pixels in size. Attempting to import
a file with a larger pixel footprint than that specified here results in the image not scaling to fit the image area in
the floor display area.
Because background images for your floors are embedded in the XML file that defines your building, you should
strongly consider minimizing the file size of the JPEGs that you use for your backgrounds. You can minimize the
file size by selecting the maximum compression (lowest quality) in most graphics programs.
NOTE: The ArubaOS WebUI displays floor plans using Adobe Flash Player, which does not support progressive JPEG images. If you
have a progressive JPEG image you want to use as background image, open the image in an image editing program and re-save the
image with standard/baseline compression.
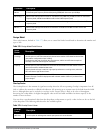
l Image Scaling
Images are scaled (stretched) to fit the display area. The display area aspect ratio is determined by the building
dimensions specified on the Dimension page.
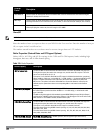
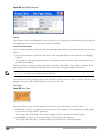
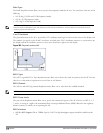
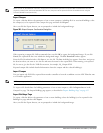
Area Editor Dialog Box
The Area Editor dialog box allows you to specify areas on your building floors where you either do not care about
coverage, or where you do not want to place an AP or AM.
Open the Area Editor dialog box by clicking New in the Areas section.
You specify these areas by placing them on top of the background image using the Area Editor.
DellPowerConnectW-SeriesArubaOS6.2 | User Guide RF Plan | 807