


264 | CaptivePortalAuthentication DellPowerConnectW-SeriesArubaOS6.2 | User Guide
If you wish your users to be able to logout using this pop-up box, then you must include a reference to
/auth/logout.html Once a user accesses this URL then the controller will log them out. It is easiest to simply edit the
above HTML to suit your users and then upload the resulting file to the controller using the WebUI under
Configuration > Management > Captive Portal > Upload custom pagesand choose "content” as the page type.
Once you have completed your HTML, then you must get the clients to create the pop-up box once they have
logged into the controller. This is done by inserting the following code into your welcome page text and re-uploading
the welcome page text to your controller.
Common things to change:
l URL: set the URL to be the name of the pop-up HTML file that you created and uploaded. This should be
preceded by "/upload/"
l Width: set w to be the required width of the pop-up box
l Height: set h to be the required height of the pop-up box
l Title: set the second parameter in the window.open command to be the title of the pop-up box. Be sure to
include the quotes as shown:
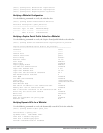
<script language="JavaScript">
var url="/upload/popup.html";
var w=210;
var h=80;
var x=window.screen.width - w - 20;
var y=window.screen.height - h - 60;
window.open(url, 'logout', "toolbar=no,location=no,width="+w+",height="+h+",top="+y+",
left="+x+",screenX="+x+",screenY="+y);
</script>
Customizing the Logged Out Box
In order to customize the Logged Out box, you must first customize your Welcome page and also your Pop-Up box.
To customize the message that occurs after you have logged out then you need to replace the URL that the pop-up
box will access in order to log out with your own HTML file.
First you must write the HTML web page that will actually log out the user and will also display page that you wish.
An example page is shown below. The key part that must be included is the <iframe>..</iframe> section. This is
the part of the HTML that actually does the user logging out. The logout is always performed by the client accessing
the /auth/logout.html file on the controller and so it is hidden in the html page here in order to get the client to
access this page and for the controller to update its authentication status. If a client does not support the iframe tag,
then the text between the <iframe> and the </iframe> is used. This is simply a 0 pixel sized image file that
references /auth/logout.html. Either method should allow the client to logout from the controller.
Everything else can be customized.
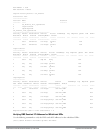
<html>
<body bgcolor=white text=000000>
<iframe src='/auth/logout.html' width=0 height=0 frameborder=0><img src=/auth/logout.html
width=0 height=0></iframe>
<P><font face="Verdana, Arial, Helvetica, sans-serif" size=+1>
You have now logged out.</font></P>
<form> <input type="button" onclick="window.close()" name="close" value="Close
Window"></form>
</body>
</html>